Thank Your For Stopping By

Thank you so much for stopping by to visit my blog... it is changing as I change and learn more things... I hope after Christmas to get an opportunity to make some more CARDS. I am loving Loom Knitting now... and have lots to do before Christmas....I don't mind sharing how I do things and if you have questions you can E-MAIL me @ winacard@gmail.com and I will be happy to answer any questions that I have.


Showing posts with label Gypsy Font. Show all posts

Saturday, June 19, 2010

Our Monsters ~ With Video

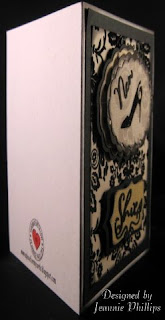
Designed by Jeannie Phillips ~ Southside, Al
Click on any picture to enlarge.
There is a instructional VIDEO at the bottom of this post.
The Gypsy File is available for this card by email. Just copy and paste this email to your personal email account winacard@gmail.com and let me know which Gypsy file that you are wanting.

I just have to tell you this card stumped me all week long… all week!!… I have been frozen about making this card and it has kept me from making a card all week long!!… it is the first time that I used mini monsters.. Which I love!! And I just let these little fellows get the best of me…. I do suggest that you cut a couple of these out in larger sizes to practice on, it will get it all clear in your head and be less intimidating!.. They really aren’t hard… once you make one for the first time.

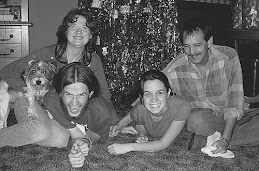
This card is for my dear husband for Father’s Day…I hand did the inside to remind him of when our grown up kids were just little kids…I so hope that he loves it.

*There is now a link at the bottom of each post where you can show off your recreation of my cards… I would love it if you share your recreations with me! You can add your picture from your blog, the Cricut Message Board, or a photo storage place like Photo Bucket….Thank you so, so much for looking!  Don’t forget to add your pictures!!!… that just makes me happy!!
Hugs, Jeannie
CRICUT & GYPSY
*Cricut cuts or this card are not included because of all the welding and other changes on this card.
Mini Monsters
The word “Monsters.” its shadow cut and its layer cut  cut @ w 4.59 x h 1.99...to get this measurement you will have to unlink the width and height… weld the shadow cut of the Monsters to the shadow cut of the word monster… see mat shot below.
Monster with wings and all it’s layers cut @ h 1.52..set the height and the width will be right…be sure and re-link your width and height first.
The other Monster and its layers  cut @ h 1.52...set the height and the width will be right.
Gypsy Font
“our” and its shadow cut @ h 1.49 set the height and the width will be right… I welded the u and r together on the shadow first then on the letters … I welded the shadow cut of our to the phrase cut of Monsters.
Card base is 4 ¼ x 5 ½, Frame piece 4 x 5 ¼ , Background piece 3 ½ x 4 ¾… these cuts are on the inside and outsides of my cards… Sentiment piece 2 ¾ x 4 inside only….. I cut all of these with my paper trimmer.

On the Video for this card (at bottom of this post) I try to explain the layering really good…I hope it helps you!

I love sharing the instructions and files for my cards but I do ask that if you use my instructions or files to recreate my card and place it on your blog or somebody else’s blog that you give me the credit for the original design. I also ask that you do not submit my designs for publication, profit or for any contest. Thank you!





Tuesday, February 23, 2010

Hi Little Girl... The story to this card is a must read!

Designed by Jeannie Phillips ~ Southside, AL
Click on any picture to enlarge.
My dear husband, Robby is a UPS man... yesterday when he was delivering a package to one of his regular stops, a music store... the little girl who's mom owns the store, came running up to Robby... so excited and with a piece of paper in her hand...and with  her little broken 4 year old speech said "I got you something"... and thrusted a crumpled piece of paper in his hand...with Hi written in yellow magic marker... he eyes were so bright and happy...she was so proud!!... and so was he... it was the first thing he showed me when he walked through the door and he asked me to make her a card... well I knew without a doubt it had to have "Hi" on it...she could read that ... after much thought this is the card I came up with... I so hope that she loves it!!...thank you so much for looking... Hugs, Jeannie
CRICUT & GYPSY
Pooh and Friends
Elephant and its layers cut @ h 5.47..if you set this height the widths will be right... I cut it out twice..from one piece...after it was layered... I cut away the head, front arm...and front leg and popped them from the second layer elephant...on the Cricut I would cut this at 5 1/2 inches.
Gypsy Font
Flower (used the shadow) cut @ w1.53 x h 1.26 inches and welded to the stem (from George).... using the Cricut I would choose a different flower...and cut it @ 1 1/4 inches.... this is just a guess for the flower cut from a different cartridge.
Walk in My Garden
Stem cut @ w 1.72 x h 4.78...I welded one of the tulips cuts to this..cut it all out in green so I would have a place to glue the colored tulip to....on the Cricut I would cut this @ 4 3/4 inches.
Christmas Cheer
Tag and its shadow cut @ h 1.84 inches... the width will be right if you set the height...on the Cricut I would cut this @ 1 1/2 inches.
Learning Curve
"Hi" cut @ h 0.89 inches... the width will be right if you set the height...on the Cricut I would cut this @ 3/4 an inch.


Wednesday, February 17, 2010

Searching for Honey

Designed by Jeannie Phillips ~ Southside, Al
Click on any picture to enlarge.
I made this card last night... while cooking dinner.... it needs something... but I just couldn't figure out what... but I still like it ... I just love this Tulip Cut from Gypsy Font...I am going to use it again for sure... just have to figure out exactly how I want to use it...thank you for looking!!! Hugs ~ Jeannie

CRICUT & GYPSY
Not including Cricut cuts because of the Gypsy Font cartridge.
Gypsy Font
Tulip cut @ w 2.89 x h 2.50.
Tulip Shadows cut @ w 2.87 x h 2.36.
I cut one in black with the stretch heart shape welded to it for the stamen.
I adhered one of the pink shadow cuts to the black shadow cut...I popped this from the background paper...and popped the pink shadow with the tulip outline cut from that.
Accent Essentials
Outline Heart cut @ w 3.56 x h 1.49...to get this size you will have to unlink the width and height.
I welded this to the black flower outline.
Pooh & Friends
Bee and its and layers  cut @ w 1.67 x h 2.02.
*The shadows I cut in velum (2)... these need to be moved on the screen....... also you need one extra bee piece in yellow and one in black.... you will trim the antenna's cut from the yellow piece...and the wings cut from all but the velum pieces.
You will need one layer cut in black.
Layer these from the bottom up like this...the black bee cut with the antenna's but without the wings...then the two velum pieces without antenna....then the yellow bee cut without the antenna's and wings.
George
Circles for stamen cut @ w 0.41 x h 0.38.


Wednesday, January 27, 2010

Snail Mail... Got my new Paisley cart...so excited.

Designed by Jeannie Phillips ~ Southside, AL
Click on any picture to enlarge.

I got my new Paisley card in the Mail on Monday...was busy all day!!...then at the doctor yesterday I laid out this card.... and today I found some wonderful scraps... and I am so excited at how this turned out!!... I hope that you like it too... the layers are a little tricky..but once you figure them out..they make such cute creatures!!... thank you so much for looking... Hugs, Jeannie

CRICUT & GYPSY
Paisley
Snail and all its layers cut @ h 1.88 inches... set the height and the all the widths will be right.
The layers include the black full snail, the full snail with the eyes cut out, the snail shell, the sun, the sun center, and the cheeks.... on the Cricut I would cut these at 1 3/4 inches.
Walk in My Garden
Ladybug and its layer cut @ h 0.89 inches... the width will be right with this height....on the Cricut I would cut this at 3/7 and inch.
Pooh and Friends
Clouds cut @ w 3.60 x h 2.06...I flipped the second one..and overlapped the small clouds and welded to save paper...On the Cricut I would cut these @ 2 1/4 inches.  
Doodlecharms
Envelope cut @ w 1.12 x h 0.70 inches... on the Cricut I would cut this at 3/4 and inch.
George
Tiny Heart for envelope cut @ w 0.34 x h 0.27 inches... on the Cricut I would cut this at 1/4 and inch.
Zooballoos
Grass cut @ w 3.38 x h 1.53 inches... 4 times...I welded two of the grasses together to get the total link I wanted... this cut is on layer and shift on the bottom row of Zooballoos... on the Cricut I would cut these on real dial size at 3/4 and inch 4 times and overlap to get the length you need.
Gypsy Font
"Snail Mail" cut @ h 0.91 inches..set the height and the width will be right on all the letters... I welded the letter together on "snail"...and then on "mail."...on the Cricut I would cut this @ either 3/4 an inch or 1 inch.


New Shoes ~ Cheap Therapy

Designed by Jeannie Phillips - Southside, Al
Click on any picture to enlarge.


This card is for my card class....I am so so enjoying this class...it is just too much fun.... I have the sweetest group of ladies that are there and they just make my week.... they are learning lots... now that they all have Gypsies we put the card we make that week on their Gypsy so they can go home and repeat the card if they want.... I can't wait until one of them calls me and says "I cut out my card!!"... I will just be too excited... Since not everybody has the same carts I am making something from the Gypsy Wanderings and Gypsy Font cartridges for a few weeks while they are getting the hang of things so they CAN go home and use their Gypsy... this is the card I came up with for this week...when I saw the shoe cut out in the oval scallop this card just popped right into my head... I got to use a new technique I learned too from Christmas With The Cricut... on a cut out...like with the shoe...you just take clear packing tape... stick to the back over the cutout...turn it over and sprinkle glitter on the cutout...and it stick to the tape....so quick and easy...and so effective!!... Thank you so much for looking!!... A special thank you to my card class ladies!!... Hugs, Jeannie

CRICUT & GYPSY
Gypsy Wanderings
Oval with shoe cut @ 2.75 x 1.84.
Ovals under the shoe cut cut @ w 3. 0 x h 1.89, w 3.25 x h 2.05 and w 3.50 x h 2.21.
Book Plates  cut @ small (2) - w 2.44 x h 1.16 and large w 2.93 x h 1.40.
On these cuts I unlinked the witdth and the height so get the sizes I wanted.
Swirley (2)  cut @ w 0.73 x h 1.55...then use the rotate button to turn design.
Gypsy Font
"New" cut @ h 0.61...the witdths will be right on all the letters if you set the height @ 0.61.
"Shoes" cut @ h 0.87 the width will be right on all the letter if you set the height @ 0.87.
The letters to "New" and the letters to "Shoes" are welded together...except for the S.


Friday, November 6, 2009

Snow Much Fun

Designed by Jeannie Phillips - Southside, AL
Click on any picture to enlarge.
Everyone was making penguin cards on the Cricut Message Boards for this weeks BBTB Challenge and I so love penguins so I had to jump in and make one myself!!... I had this idea...thought the paper choice would look like a long winters night... not sure if I like how it turned out...then when I look again I like it... maybe tomorrow I will make up my mind... let me know what you think... I used my Gypsy to weld circles and rectangles to make the background border for the SNOW... if you are still sitting on the fence about getting a Gypsy I can tell you I just love my Gypsy... love it!! Hugs, Jeannie

I was unable to make Cricut cut sizes because of stretching some items by height only and the use of the Gypsy Wanderings cartridge.
CRICUT & GYPSY
Gypsy Wanderings
*SNOW* cut @ w 5.10 x h 1.55
George
I used the following shapes to create the Shadow Border for the snowflakes and the word snow I welded the shape together.
First circle cut @ w 1.54 x h 1/44.
Oval cut @ w 1.1o x h 1.79.
Rounded rectangle cut @ w 1.14 x h 1.78.
Rounded Square cut @ w 0.89 x h 0.83.
Last circle cut @ w 1.82 x h 1.70.
I grouped all of these shape together to duplicate them for the second shadow. I popped the first shadow from the second shadow for depth.
Joys of the Season
Shadow penguin cuts cut @ w 1.90 x h 2.24.. I cut 2 in black and one in white.
Layer penguin cut cut @ 1.96 x h 2.31.
Home Decor
Flourishes cut @ w 5.12 x h 1.74.
Gypsy Font
"f" in fun cut @ w 0.68 x h 2.07... I used a circle and rectangle to alter my f...which I could have just done with scissors (laughing at myself).
"un" in fun cut at h 1.37 the width will change with the height.
Welded the letters together in fun.
"much" welded and grouped cut @ w 3.01 x h 1.31.
This is the screen shot of my Gypsy just before I cut... I grouped the cuts by color.. be sure and save your files before you do anything.

Monday, November 2, 2009

A Grandmother's Shoes

Designed by Jeannie Phillips ~ Southside, Al
Click on any picture to enlarge.I am so excited about The Gypsy Spot!!....and being a Design Team member!!... I will miss The Cuttlebug Spot... but this new blog of Nilda has me so excited... I am so loving my Gypsy!!... just loving it!! ... so this new blog is going to be wonderful wonderful fun... this week were were to use a cut from Gypsy Wanderings and when I saw the shoes I though of my Grandmother who passed away October 17... I am missing her already... she was 96 .... this card is in memory of her, Violet Sherrill Pinson... Be sure and check out The Gypsy Spot and see what the other Design Team members have come up with... and please join us and create something wonderful of your own.

CRICUT & GYPSY
Gypsy Wandering
Shoes cut @ w 2.53 x h 1.64.
Shoe Shadows cut @ w 2.79 x h 1.74.
Gypsy Font
(I love this font)
"A" cut @ w 1.o x h 0.89.
"Grandmother's" cut @ w 3.47 x h 3.76.
These numbers are after the letters were turned and moved together..then welded together.
To get the arch I built the letters around the oval after I moved it over the card base template where I wanted it to be... that way it was just the right size when I cut it... I moved it before I cut it so I could place all my dark brown objects together for laying out my papers.
"Shoes" cut @ w 1.64 x h 0.72 after the letter were moved together and welded.
George
Oval cut @ w 5.65 x h 6.59.
After the oval was cut I laid it on my card background..then marked where I wanted to trim it...the leftover pieces of the oval I used on the inside.

This is what my mat looked like when I cut the images... I put a brown piece of paper 4 1/2 x 11 down the left side...and a 4 x 4 1/2 piece of paper in the top right corner for the shoes.. I also put a 7 1/2 x 6 inch piece of patterned paper over the oval...so all the items cut out in one cut...

Often at the present the welded items won't cut with the non welded items... leave all your paper on the mat...make sure you have saved your file... delete all the non welded items from your mat then cut again... your welded pieced will cut then...when prompted to save changes choose don't save... then you still have all your cuts when you return to this file.

Sunday, November 1, 2009

Gypsy Challenge Miss-Entry (With Instructions)

I had added these instructions and the screen shot earlier in the week...but I guess I hit the wrong button!!...I am sorry... because I don't mind sharing at all!!... To learn more about this card click here.
Here are the details...I have quit crying!!... there is a screen shot below.

CRICUT & GYPSY
Gypsy Wandering
Owl cut @ w 1.35 x h 1.87.
Owl shadow cut @ w 1.46 x 1.87 2 times.
I cut the shadow twice to pop dot the shadow and the regular cut from the bottom shadow cut.
Pumpkins cut @ w 1.72 x h 1.85 1 time and w 1.52 x h 1.64 2 times.
Pumpkin shadows cut @ w 1.72 x h 1.74 1 time and w 1.53 x h 1.64 2 times.
I ****embled all 6 pumpkins and popped the second set of three from the first set of 3.. you could actually just cut 2 sets of shadows and one set of pop pieces..and pop the ****embled top pieces form the second set of shadows and get the same effect.
Leaves cut @ w 0.97 x h 0.94 and w 0.85 x h 0.83.
I cut 12 of the larger leaves and 3 of the smaller ones.
4 large ones and 1 small on each in red, yellow and green.
Branches cut @ w 3.77 x h 2.95 and w 2.77 x h 2.16.
I welded these together...and cut them out twice...to pop the second layer.
Gypsy Font
Happy Fall
Happy cut @ w 2.95 x h 1.12
This is the measurement after welding the letters together.
Fal l cut @ w 2.08 x h 1.04.
This again is the measurement after welding the letters together.
George
Large Square (used as frame for the happy fall) cut @ 4.01 x h 3.0
Smaller Square (used as frame for the happy fall) cut @ w. 3.23 x h 2.33.
Circle for moon cut @ w 4.23 x h 3.95.
~~~~~~~~~~~~~~~~~~~~~~~~

I cut all the items shown below..then deleted all items but the shadow of the owl... and the pumpkins and their shadow...and the branches... these items I left on the mat and cut an extra set of... but be sure and save your layout before you delete any items...then when you close out your layout be sure and choose do not save changes.

Thursday, October 29, 2009

I'd Travel the World

Designed by Jeannie Phillips -Southside, AL
Click on any picture to enlarge.
Robby took me to Hobby Lobby Saturday and I fell in love with this paper... it screamed romantic!!! card...just screamed it!!... and if you have known me for only 5 minutes you could figure out I love romantic!!... I made this for Robby... hope that he loves it!... the "stamps" are printed all on a sheet of paper there are probably 100 of them... on one page... Thank you so much for looking!... Hugs, Jeannie
CRICUT & GYPSY
Going Places
Globe cut @ w 2.64 x h 2.54.
Globe Shadows cut @ 2.73 x h 2.54.
Gypsy Font
"I'd" cut @ w 1.30 x h 1.71... after welding.
"travel" cut @ 3.42 x h 1.47 ... after welding.
"love" cut @ 2.36 x h 1.55 after welding.
"the" cut @ 1.32 x h 0.89 after welding.
"for your" computer generated.
Lots of brown Ink.
K & COMPANY Life;s Journey paper pack.

This is my screen shot... just before I cut ... the welded Gypsy Font cut with the other cuts!!.. yippee... wish all my welded stuff would cut that way!!... I did add Cartridge notes and saved them after I finished cutting.


Tuesday, October 27, 2009

Brittney's Birthday Card

Designed by Jeannie Phillips
Click on any picture to enlarge.
Brittney a friend of mine who I met at work.... we have stayed really, really close. since she left work.. her birthday is November 1st... and we eat out the last week of the month each month... so tonight is our night to eat out and this is her birthday card... she loves butterflies... and I often call her "B" so this is what I came up with... my future DIL, Robin eats with us too so I left room for her to sign...Hope that she likes it... the busy paper called for a simple card... so there is no screen picture of this one...but I will give you the size.
CRICUT & GYPSY
Gypsy Fonts
Scalloped oval with "B" cut @ w 2.69 x h 3.50
Scalloped oval in dark pink cut @ w 3.05 x h 3.80
The rectangles behind the ovals were cut with my paper trimmer...
the back rectangle is 4 x 5.25
the center one is 3.75 x 5
and the top one is 3.5 x 4.75.
The butterflies are from a MARTHA STEWART punch.
Blog Widget by LinkWithin
Thank you so much for signing my Guestbook... I have no idea how to reply to people who do sign in... but I so love it when you do!!... So thank you so much!... if you ever have any questions you can email me @ winacard@gmail.com. I will be happy to answer any questions you might have.

Thank you again for signing my Guestbook~
Jeannie

Please Sign In