Thank Your For Stopping By

Thank you so much for stopping by to visit my blog... it is changing as I change and learn more things... I hope after Christmas to get an opportunity to make some more CARDS. I am loving Loom Knitting now... and have lots to do before Christmas....I don't mind sharing how I do things and if you have questions you can E-MAIL me @ winacard@gmail.com and I will be happy to answer any questions that I have.


Showing posts with label Pooh and Friend. Show all posts

Wednesday, September 8, 2010

Katelyn's Birthday Present and Card


Designed by Jeannie Phillips ~ Southside, Al
Click on any picture to enlarge.
The Gypsy File is available for this card by email. Just copy and paste this email to your personal email account winacard@gmail.com and let me know which Gypsy file that you are wanting.

I am so excited about all of this… I love the card because it matches the present so perfectly!.. This made it so much fun to make… I am excited about the toboggan and the scarf because I learned to do stripes on my Knifty Knitters!!… these are so much fun!!.. This is only my second toboggan too… in the south we call these knitted caps, toboggans… I know all my friend from up north are laughing…but a toboggan is what they are to me!!… Thank you all so much for looking!! Hugs Jeannie

CARD INSTRUCTIONS
CRICUT & GYPSY
Rock Princess
Girl and her layers cut @ h 2.93... Set the height and the width and height will be right on all the layers… I did leave out a couple of her layers and did the hide contour on others… I cut two of the body so that I could pop her from the background twice. ……on the Cricut I would cut these at 3 inches.
Stamping
Happy Birthday and it shadow cut @ h1.47...set the height and the width will be right on both cuts… on the Cricut I would cut this at 1 ½ inches.
Pooh and Friends
Toboggan and its layers cut @ h 1.13 … set the height and the width will be right…on the Cricut I would try cutting these @ 1 inch and at 1 ¼ inches and see which one fits better.
Paper Dolls for Everyday
Scarf cut @ w 1.15 x h 3.71...I cut one in blue and one in orange so I could cut out the stripes that I added to the scarf .....I folded part of the scarf behind the girls neck... on the Cricut I would cut this @ 3 ¾ inches…I did the background piece that say Katelyn over and over on my computer.

Card base 4 ¼ x 5 ½ inches… Frame piece 4 x 5 ¼ inches…. Background piece 3 ½ x 4 ¾ inches… Sentiment piece 2 ¾ x 4 inches… all these pieced I cut on my paper trimmer.

On the toboggan I used the next to large round Knifity Knitter and on the scarf I used the small one.


I love sharing the instructions and files for my cards but I do ask that if you use my instructions or files to recreate my card and place it on your blog or somebody else’s blog that you give me the credit for the original design. I also ask that you do not submit my designs for publication, profit or for any contest. Thank you!

Monday, May 31, 2010

God Bless This Next ~ BBTB2 DT Challenge ~ Blog Hop Blog Candy Give-A-Way


Designed by Jeannie Phillips ~ Southside, Al
Click on any picture to enlarge.
There is a instructional VIDEO at the bottom of this post.
The Gypsy File is available for this card by email. Just copy and paste this email to your personal email account winacard@gmail.com.

I HAVE BLOG CANDY THIS WEEK

We are having a blog hop over at the BBTB2  this week… if you hop through everybody’s blogs you will have a chance to win lots of prizes… from my blog you can hop to Teresa’s blog by clicking here! To win my blog candy (pictured at the bottom of this post) watch my video on how to make this card and leave comment… I will draw on Sunday afternoon for the winner! I will post the winners name on my blog…and if you have a blog I will leave you a comment on you blog if you win… you have 3 days to send me an email @ winacard@gmail.com.(copy and paste this email address to your own email account). When I get your address I will put your prize in the mail! Good Luck!!

Our cut for this week at BBTB2 was “Bless this Nest” from the Sweethearts cartridge… I always try to do my second idea because I think my first idea might just be everybody’s first thought… this is what I came up with this week…I hope that you like it…be sure and stop by the BBTB2 and see all the other wonderful projects the other Design Team member have come up with… they have done just a beautiful job… Thank you so much for looking at my project. Hugs, Jeannie

CRICUT & GYPSY
Sweethearts
“Bless Your Nest” cut @ w 2.18 x h 2.26 … on the Cricut I would cut this @ 2 1.4 inches.
Base Camp
“God” and its shadow cut @ h 0.70... Set the height and the width will be right....I welded the shadow “God” to the top of Bless from “Bless this Nest”…. . On the Cricut I would cut this @ ¾ and inch…. You can adhere this to the paper without welding it if you use your Cricut.
Stretch Your Imagination
Birdhouse its shadow blackout and its layers cut @ h 3.44...set the heights and the widths will be right… on the Cricut I would cut these @ 3 ½ inches.
Home Décor
Birds and their shadows cut @ h 0.93 set the height and the width will be right… on the Cricut I would cut these @ 1 inch.
Pooh and Friends
Branches cut @ w 3.65 x h 5.86 … I used the hide contour feature on the extra piece by the branch so that it wouldn’t cut… on the Cricut I would cut these @ 5 ¾ inches.
George
Hearts cut @ w 0.57 x h 0..45... You will only need 7 hearts… I cut out extras to put in the envelope with the card… on the Cricut I would cut these at ½ an inch.
Card base is 4 ¼ x 5 ½, Frame Piece 4 x 5 ¼ , Background piece 3 ½ x 4 ¾… this cuts are on the inside and outsides of my cards… Sentiment piece 2 ¾ x 4 inside only….. I cut all of these with my paper trimmer.


BLOG CANDY…DON’T FORGET TO WATCH THE VIDEO AND LEAVE A COMMENT!

Sunday, April 25, 2010

Watering God's Flowers


Designed by Jeannie Phillips ~ Southside, AL
Click on any picture to enlarge.
More pictures below instructions including screen shots.

The Gypsy file is available for this card my email...just copy and paste my email address into your own email account... winacard@gmail.com.

I thought of this card last night during all the rain and got really excited to make it but it was just too late!!... finally today I got the chance and I am excited at how it turned out... to me it is such a happy card... sometimes we think of rain as a bother ... something that gets in our way... I felt like this is how God thinks of the rain.... a happy moment... the angles going about their work being happy... I hope that you like it... thank you so much for looking... thank you too for any comments they just make my day! ... Hugs, Jeannie

CRICUT & GYPSY
Easter 2010
Shorter Grass cut @ w 1.98 x h 1.19 ... place two in the mat and weld them together....this is the grass on the very front row.... on the Cricut I would cut 2 or these at 1 1/4 inches...and overlap them on the card to get the length you need.
Taller Grass (2) ...duplicate the shorter grass then unlink the width and height and change the height to
 h 1.59.....when I cut two rows of the same grass I flip the second row so they won't just overlap each other...on the Cricut I would cut 4 of these @ 1 1/2 inches and overlap on the card to get the length you need.
Walk in My Garden
Daffodils and their layers cut @ w 0.69 x h 1.74... I welded 5 to one piece of tall grass and 4 to the other piece of tall grass.. on the Cricut I would cut these at 1 3/4 inches and place five in front of the back row of grass and 4 in front of the middle row of grass.
*I wanted just the yellow part of the Daffodils to place over my green ... before I added the layers so I added that many daffodils to my mat and moved all but the tops of the flowers off the page.. see mat shot below... so I could put yellow over the green...then add the layers.

Watering can (2)  cut @ w 1.34 x h 0.89... I popped one off the other....on the Cricut I would cut these @ 3/4 an inch.
Angel Instructions
New Arrival

Baby cut @ w 1.20 x h 1.42...on the Cricut I would cut this at 1 1/2 inches.
Paper Doll Dress Up
Angel's Hair is Raggedy Andy's hair cut @ w 1.29 x h 2.42...weld three of these onto the babies heads cut the fourth one in yellow..... on the Cricut I would cut this @ 1 inch...I think that will work... you can glue these to the baby's heads if using your Cricut.
Pooh and Friends
Butterflies cut @ w 0.80 x h 0.88.. I welded a George rectangle cut @ w 0.20 x h 0.27 to the bottom of the butter fly..group them ...then duplicate...flip the second one from top to bottom and rotate it... move into place and group all of these together....you are going to trim off the tail and the nose and antennas and fold this in half...and glue it in between two of the angle cuts....on the Cricut I would cut 2 butterflies @ 1 inch.. glue the bodies together.. trim off the tail and the nose and antennas and glue that little part together... then glue this between two of the baby bodies.
Dreams Come True (Disney)
Clouds cut @ w 3.66 x h h 1.84... I love these clouds they are so magical... on the Cricut I would cut these @ 1 3/4 inches.


Tuesday, April 6, 2010

Guard-in Angel (Story behind title)

Designed by Jeannie Phillips - Southside, AL
Click on any picture to enlarge.

The story is important to the title of this card... it gives me a warm fuzzy feeling!!.. first I connect with a childhood friend on Facebook recently....and through our conversation we found out that we had shared so much more in childhood than we knew... it no wonder we were drawn to each other...so I wanted to make her a card and asked what she liked...she said Guardian Angels..so I thought how am I going to make this card without it being all formal.... I wanted something sweet and cute...then I remembered that once when my son was little he saw a snake in his Big Papaw's garden...we told him no to worry it was just a garden snake... he was delighted...being into superheroes as he was and said "oh a guard-in sake... they guard the garden!!!"...and that is how this card came to be... I remembered a stamp that I was thinking was a Cricut cut and imagine my dismay when I remembered it was a stamp...one that I didn't have!!... so when Joyce told me oh Jeannie you can make anything...I couldn't disappoint her!!...THANK YOU JOYCE... to make the angel I used the crawling baby from New Arrival... and butterfly wings from Pooh and Friends!!... and Raggedy Andy's hair from Paper Doll Dress Up..turned sideways a bit... so the left ear of the baby ended up being its nose!..I am so excited about my little angel!!...beyond excited...I hope that you like it!!... thank you so much for looking and for you comments!!... Hugs, Jeannie

Gypsy file available by e-mail @ winacard@gmail.com.
Copy and paste this e-mail address into your personal email.
CRICUT & GYPSY
New Arrival
Baby cut @ w 1.20 x h 1.42...on the Cricut I would cut this at 1 1/2 inches.
Paper Doll Dress Up
Angel's Hair is Raggedy Andy's hair cut @ w 1.29 x h 2.42...weld three of these onto the babies heads cut the fourth one in yellow..... on the Cricut I would cut this @ 1 inch...I think that will work... you can glue these to the baby's heads if using your Cricut.
Pooh and Friends
Butterflies cut @ w 0.80 x h 0.88.. I welded a George rectangle cut @ w 0.20 x h 0.27 to the bottom of the butter fly..group them ...then duplicate...flip the second one from top to bottom and rotate it... move into place and group all of these together....you are going to trim off the tail and the nose and antennas and fold this in half...and glue it in between two of the angle cuts....on the Cricut I would cut 2 butterflies @ 1 inch.. glue the bodies together.. trim off the tail and the nose and antennas and glue that little part together... then glue this between two of the baby bodies.
Walk in My Garden
Tulips and its flower layers cut @ w 0.92 x h 2.58....on the Cricut I would cut these @ 2 inches.
Ladybug and its layer cut @ 2 1.32 x h 0.89...on the Cricut I would cut this at 3/4 an inch.
Worm cut @ w 2.55 x h 1.0....I forgot it had a layer for its feet... and I was lazy and just drew them in... on the Cricut I would cut this @ 1 inch.
Easter 2010
Short Grass cut @ w 1.59 x h 1.09 x h there are four of these pieces to make a grass layer... I flipped two and welded  and grouped them together to get the length I wanted.. which was 4.75 inches...
Tall Grass is the complete piece of short grass duplicated.. flipped side to side and change the height to....h 1.59... on the Cricut I would cut 4 for each row of grass.. and overlap them to create the grass..cutting one set a 1 inch and the other two sets @ 1 1/2 inches.
I popped the first layer of tall grass from the background paper...then glued the yellow tulips onto that... then popped the second row of tall grass from that and added the pink tulips ..cutting one of the pink tupips into two pieces ...so that I would have a tulip for the inside...then I glued the row of shorter grass directly on top of that.


Wednesday, February 17, 2010

Searching for Honey

Designed by Jeannie Phillips ~ Southside, Al
Click on any picture to enlarge.
I made this card last night... while cooking dinner.... it needs something... but I just couldn't figure out what... but I still like it ... I just love this Tulip Cut from Gypsy Font...I am going to use it again for sure... just have to figure out exactly how I want to use it...thank you for looking!!! Hugs ~ Jeannie

CRICUT & GYPSY
Not including Cricut cuts because of the Gypsy Font cartridge.
Gypsy Font
Tulip cut @ w 2.89 x h 2.50.
Tulip Shadows cut @ w 2.87 x h 2.36.
I cut one in black with the stretch heart shape welded to it for the stamen.
I adhered one of the pink shadow cuts to the black shadow cut...I popped this from the background paper...and popped the pink shadow with the tulip outline cut from that.
Accent Essentials
Outline Heart cut @ w 3.56 x h 1.49...to get this size you will have to unlink the width and height.
I welded this to the black flower outline.
Pooh & Friends
Bee and its and layers  cut @ w 1.67 x h 2.02.
*The shadows I cut in velum (2)... these need to be moved on the screen....... also you need one extra bee piece in yellow and one in black.... you will trim the antenna's cut from the yellow piece...and the wings cut from all but the velum pieces.
You will need one layer cut in black.
Layer these from the bottom up like this...the black bee cut with the antenna's but without the wings...then the two velum pieces without antenna....then the yellow bee cut without the antenna's and wings.
George
Circles for stamen cut @ w 0.41 x h 0.38.


Friday, November 27, 2009

Bouncing Baby Tiger

Designed by Jeannie Phillips - Southside, AL
Click on any picture to enlarge.
I made an Alabama Baby card the other day and since I have one child that graduated from Alabama and one child at Auburn it was only fair to create an Auburn card to match... I had lots of fun making both cards... the Alabama card is just a couple of post down so be sure and visit it too if you haven't already... I hope you like!!.. thank you so much for looking! Hugs, Jeannie
CRICUT & GYPSY
Pooh & Friends
Accent Essentials
Opposites Attract
Street Signs
New Arrival
George
Instructions below with the screen shot... you can enlarge it by clicking on the picture.
I think this will make the instructions clearer.. let me know which way you like them best so I know how you want me to post the instructions.All items in red are welded together.
Click on the picture to enlarge and you can read the instructions much better.
You can e-mail me at winacard@gmail.com if you have any questions.

Monday, October 5, 2009

Nested Squirrel

Designed by Jeannie Phillips - Southside, AL
Click on any picture to enlarge.
I found this little tiny note on my cardmaking table...it said I want one with an arrow...well by then the arrow wasn't pointing to anything... so I called my daughter, Madison...and she had seen this squirrel on my Winter Woodland cartridge.... I was looking at my Gypsy Owl card...and thinking of a book I saw the other day...and decided that a lot of my design for my Gypsy Owl card would work for this card... so I took some things away...and added some things...and in no time at all I had this card designed!!.... I am loving my Gypsy... just loving it!! Hope that you like my card...I cherish your comments!! I really really do! ... Hugs, Jeannie
CRICUT
Winter Woodland
Squirrel cut @ w 1.43 x h 1.50.
Squirrel layer cut @ 1.23 x 1.50.
You don't have to put in both numbers if you select both images at the same time and keep them grouped if you change the size... you can un-group them when you are ready to print to place them in the right place on your mat.
Gypsy Wanderings
Branches cut @ w 3.38 x h 3.42 and w 3.98 x h 3.11 and w 2.36 x h 1.84.
The smallest and one of the largest branches are welded together.
Leaves cut @ w 1.03 x h 1.0 there are 18 leaves all together.
I spread out the rows so that I could put 3 different 2 x 8 strips of paper down to get 3 different colored leaves.
Pooh and Friends
Moon cut @ w 1.62 x h 1.79.
I used the moon for the base for my Martha Stewart Branch Punch so that I would keep them in the right area and the spaces wouldn't show through...the moon shape is cut in brown.
I didn't have a layout of this card...just the cut out file...be sure to delete your notes before you print and when you are prompted to save changes say NO.

Wednesday, August 5, 2009

Pooh and Friends

Designed by Jeannie Phillips - Southside, AL
Click on any picture to enlarge.
This is another Vicki/Jeannie personal challenge card.... we wanted to use Pooh because August is Pooh Friendship Month ...something like that.... so we decided to each use a Pooh cut... any Pooh cut .... at first I was so at a loss.... just blank... the licensed carts do that to me somehow... I have trouble making the cuts "my own".... then I thought of this card...and found the little girls with the bears in their hands!!!.. how perfect was that... I asked my son to find me a Pooh quote on friendship... he said this one was his favorite so I had to use it!!!... and I agreed it was a wonderful quote.... I can't wait to see Vicki's card!!!....about to go and link it!!!... to see Vicki's card just click here! ... these challenges really make me think outside my little box... thank you Vicki!! Thank you for looking. Hugs, Jeannie

CRICUT
Pooh and Friends
Pooh Face cut @ 2 1/4 inches.
Inside Pooh Shadow cut @ 1 1/2 inches on shadow blackout.
A Child's Year
Girls cut @ 1 3/4 inches.
Storybook
Bookplate cut @ 4 inches in green and 3 3/4 inches in cream.
Home Decor
Flourish cut @ 1 1/2 inch and cut apart to use.
Flowers are a punch.

Tuesday, June 23, 2009

Pooh Flowers

Vicki and I had so much fun yesterday making our own challenge!!! the we just had to do another one... we chose the Pooh and Friends flowers on the "tiger" word page...and added Nanna's Nursery paper since we both had it... it was so so fun...I can't wait to see hers... this has really added a new dimension to making a card...different from a regular challenge... since we post at the same time...it gets really exciting!!... Hope you like both cards!!! Thanks for looking.. ~~Hugs, Jeannie
CRICUT
Pooh & Friends
Flowers cut @ 5 inches once on regular cut, 2 times on shift for the layers.
The layers I cut once to add to the green where the flower cut out...the second I shaded with color pencils and pop-dotted from the first ones... I glued the bottom of the flower directly to the bottom flower and popped it in the middle.
The flowers and leafs of the first cut are popped from the paper but the stem is glued directly to the background paper.
Beyond Birthdays
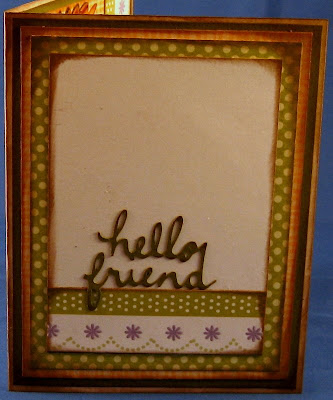
Hello Friend cut @ 1 1/2 inches.
Nanna's Nursery Paper Pack
Lots of brown ink and a fork bow.

Blog Widget by LinkWithin
Thank you so much for signing my Guestbook... I have no idea how to reply to people who do sign in... but I so love it when you do!!... So thank you so much!... if you ever have any questions you can email me @ winacard@gmail.com. I will be happy to answer any questions you might have.

Thank you again for signing my Guestbook~
Jeannie

Please Sign In