Thank Your For Stopping By

Thank you so much for stopping by to visit my blog... it is changing as I change and learn more things... I hope after Christmas to get an opportunity to make some more CARDS. I am loving Loom Knitting now... and have lots to do before Christmas....I don't mind sharing how I do things and if you have questions you can E-MAIL me @ winacard@gmail.com and I will be happy to answer any questions that I have.


Showing posts with label Jasmine. Show all posts

Wednesday, August 4, 2010

Monogram Note Card Set

Designed by Jeannie Phillips ~ Southside, Al
Click on any picture to enlarge.


The Gypsy File is available for this card by email. Just copy and paste this email to your personal email account winacard@gmail.com and let me know which Gypsy file that you are wanting.

I spent last Friday with my dear friend Jeannene and her daughter Kim…. They make these wonderful note card sets… I had to try one… This set is for a dear lady at my church, her name is Kay. Kay has been such an inspiration to me in my walk with God. I have learned so much from her, she is absolutely amazing… she loves God so much… you can tell her is just her personal friend!… I aspire to be like her to know God like she does. I so hope that she loves her note card set.. Thank you so much for looking!.. Thank you Jeannene and Kim for teaching me how to do this and inspiring me… and feeding my heart and soul! Hugs, Jeannie
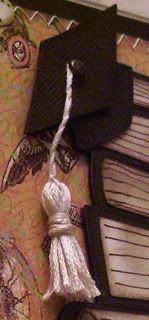
Card Case
This is an 8 ½ x 11 piece of cardstock turned so it is wider than taller….score 5 inches from each end…then score 2 inches and 2 ½ inches from the bottom… cut out the center part between the 2 and 2 ½ inch score lines.. Fold the bottoms up.. To create a bottom… anyway it makes a little book like thingy… (don’t your love my terminology!) I added a strip of paper across the middle, it goes all the way around the outside of the “book.” I added eyelets to each side wrapped my ribbon all the way around the outside of the book…it has tape on the back to hold it in place…fed the ribbon through the eyelets and this keeps the book closed.

CRICUT & GYPSY
Lovely Floral
Circle flourish and its circle base cut @ h 2.81...set the height and the width will be right on both cuts… on the Cricut I would cut these @ 2 ¾ and inch.
Jasmine
K cut @ 2.48 inches… and welded to the inside of the flourish circle… on the Cricut I would cut these at 2 ½ inches…and glue to the circle.

The trim across the middle of each background were from the paper pack that I used.


I love sharing the instructions and files for my cards but I do ask that if you use my instructions or files to recreate my card and place it on your blog or somebody else’s blog that you give me the credit for the original design. I also ask that you do not submit my designs for publication, profit or for any contest. Thank you!


Sunday, July 4, 2010

Monogram/Butterfly ~ How to Video

Designed by Jeannie Phillips ~ Southside, Al
Click on any picture to enlarge.
There is a instructional VIDEO at the bottom of this post.
The Gypsy File is available for this card by email. Just copy and paste this email to your personal email account winacard@gmail.com and let me know which Gypsy file that you are wanting.

Oh I am still playing with my Cri-Kits pens… www.cir-kits.com … I am loving these… this is a card I made for my step-mom for her birthday… her name is Gail…thus the G… I hope that she loves it… I hope to play with my pens some more then start intergrading them into my card making style more naturally…but for now I am just having a blast!

Oh and some exciting news for me…I am so excited… Dru from Cri-Kits has asked me to send her some of my cards using the Cri-Kits pens for them to show off at the CHA Show in Chicago!… What an honor is that!!… if you are there please stop by and tell them I said hi!

CRICUT, GYPSY & CRI-KITS
Layer 1 (cut pieces)
George
Rectangles .. Large cut @ w 4.75 x 3.5 .. Small w 1.90 x h 2.47... These cuts are on real dial size and you have to unlink the width and height to get both of these sizes.
*be sure to re-link your width and heigh buttons and de-select the real dial size for the rest of this card.
Circles (for tag)Large w 0.89 x h 0.83 .. Small w 0.80 h 0.75
Once Upon a Princess
Butterfly layer (its body) cut @ h 2.23..set the height and the width will be right… this butterfly body came from a different butterfly cut than the one we use it on in the card.
Tag and its layer (shift key) cut @ h 1.34 .. Set the height and the width will be right for both cuts.
Layer 2 (drawn pieces with Cri-Kits)
Once Upon a Princess
Butterfly cut @ w 2.09 x h 4.03.
Cindy Lou
Swirlssmall for the tag cut/drawn @ w 0.74 x h 0.38 duplicate and flip up for the second small swirl .. Large for the inside of card cut/drawn @ w 1/35 x h 0.69.
Jasmine
“G” cut @ w o.45 x h 0.94.
Gypsy Wanderings
“Happy Birthday” cut @ w 2.51 x h 1.71.

Card base is 4 ¼ x 5 ½, Frame Piece 4 x 5 ¼ , Background piece 3 ½ x 4 ¾… these cuts are on the inside and outsides of my cards… Sentiment piece 3 1/2 x 4 3/4  inside only….. I cut all of these with my paper trimmer.

There is now a link at the bottom of each post where you can show off your recreation of my cards… with a link back to your card on your blog, or the Cricut Message Board or a photo storage place like Photo Bucket…. I would love it if you share your recreations with me! It just makes me happy!! Thank you so, so much! Hugs


I love sharing the instructions and files for my cards but I do ask that if you use my instructions or files to recreate my card and place it on your blog or somebody else’s blog that you give me the credit for the original design. I also ask that you do not submit my designs for publication, profit or for any contest. Thank you!


Thursday, July 1, 2010

Cafe Anniversary ~ How to Video Part 1

Designed by Jeannie Phillips ~ Southside, Al
Click on any picture to enlarge.

There is a instructional VIDEO PART 1.. at the bottom of this post… VIDEO PART 2 IN NEXT POST.
The Gypsy File is available for this card by email. Just copy and paste this email to your personal email account winacard@gmail.com and let me know which Gypsy file that you are wanting.

This is an anniversary card that I made for my daughter, Madison and her husband, Cory for their 1st anniversary…I used one of my Cri-Kits pens from http://www.cri-kits.com/ . I am having so much fun with these pens!… If you are interested in how to use the pens to make them line up just right be sure and watch both videos.. There is a part 1 and a part 2. I hope that you love this card…it is simple but I thought that the simplicity of it is what added to its charm. Thank you so much for looking!!

CRICUT, GYPSY & CRI-KITS
(There are no Cricut instructions for this card.)
Layer 1 (on Gypsy)
Sweethearts
Couple at table cut @ w 1.91 x h 1.94.
Heart and it couple layer cut @ w 1.55 x h 139.
Shadow Heart cut @ w 1.69 x h 1.47
My Community
Café Shadow cut @ w 4.83 x h 5.50... Duplicate this and flip it side to side over lap a little and weld pieced together to make the shaped card.
Layer 2 (on Gypsy)
Café Shadow drawn @ w 4.83 x h 5.50
Layer 3 (on Gypys)
Café cut (regular cut) cut @ h 5.50...set the height and the width will be right.
Layer 4 (on Gypsy)
Sweethearts
Happy Anniversary" drawn @ w 2.72 x h 1.20
Jasmine
“1” cut @ w 0.20 x h 1.50
“s” cut @ w 0.15 x h 0.66
“t” cut @ w 0.26 x h 0.57


There is now a link at the bottom of each post where you can show off your recreation of my cards… the link to this card is below the Part2 Video... this will link back to your card on your blog, or the Cricut Message Board or a photo storage place like Photo Bucket…. I would love it if you share your recreations with me! It just makes me happy!! Thank you so, so much! Hugs

I love sharing the instructions and files for my cards but I do ask that if you use my instructions or files to recreate my card and place it on your blog or somebody else’s blog that you give me the credit for the original design. I also ask that you do not submit my designs for publication, profit or for any contest. Thank you!

Video Part 2  next post or click HERE

Tuesday, November 3, 2009

She loves me, she loves me not...

Designed by Jeannie Phillips ~ Southside, AL
Click on any picture to enlarge.
I was inspired by a picture to make this card... I am just loving this paper pad it is so romantic!!.. and I am such a fool for romance!! .. I hope that you like it!... I am going to try and give CRICUT INSTRUCTIONS along with my Gypsy instructions... because I have had several request for both... please if you use my Cricut Instructions let me know if they are working for you... because they are going to be a bit of guess work.... Hugs Jeannie
CRICUT & GYPSY
Walk in My Garden
Flower cut @ h 2.28 x w 1.74.. on the Gypsy .. Cricut size 1 3/4 inches.
I cut the flower twice.
I pop-dotted the flower together at the base of the flower and glued the end of the pedals directly together with a touch of glue... I shaded with chalk.
Center of flowers cut @ w 1.38 x h 1.74 on the Gypsy...on the Cricut cut @ 1 3/4 inches to match the flower.
I cut these twice in yellow only used the solid piece...I added color with chalk and pop-dotted between the yellow pieces.
Leaves cut @ w 1.58 x h 1.00 with the gypsy..on the Cricut I would cut them at inch.
I pulled the end of the leaves together and glued the ends to make the pop up in the center.
Jasmine
Corners cut @ w 1.60 x h 5.11 on the Gypsy... on the Cricut I would cut them @ 2 1/2 on real dial size... you get two corners per one cut.. cut 4 times so you also have corners for the inside of the card.
The Stem of the flower was cut with my wavy paper trimmer.
This is a picture of my gypsy mat when I cut out my card ... the center square won't cut..it is a rectangle the size of my card opened as a template...I use this to know if my cuts will fit on my card right.... be sure and save your files!...as you can see I grouped all the pieces together that need to be cut in the same colors

Monday, June 29, 2009

Turtle Friends

Designed by Jeannie Phillips Southside, Al
Click on any image to enlarge it.
Turtle Friends, so fitting for another one of mine and Vicki's challenges... Vicki picked this cut... and I picked Friends after looking at the cut... I though "Those realistic turtles oh Vicki you have got to be kidding me!". but that is what makes it a challenge isn't it... then I found my paper...and knew the front facing turtle was sitting on the back of the side facing turtle and I got excited and went to work... I hope that you like it... it was such a fun card to do.

Disclaimer: My thief of a cat took my directions!!!... she always takes my craft supplies... I have no idea why!...but this time while my card was drying she took my directions ... so this is from memory...

CRICUT
Animal Kingdom
Side turtle cut at either 3 inches or 2 3/4 inches.
Front facing turtle cut @ either 2 inches or 1 3/2 inches.
I am thinking its the whole numbers but they are measuring the fraction numbers.
Zoobaloos
Grass cut @ 1 inch on real dial size... twice on layer feature for the front rows once on regular cut for the back row which I wish I had cut at 1 1/4 inch (the back row).
Jasmine
Corners cut at 2 1/4 inches on real dial size.
Inside corners cut @ 1 1/4 inches on real dial size.
Punched flowers w/Stickles for the centers.

Wednesday, May 27, 2009

Thank You Note... House Mouse

I am still working on Thank You cards for the sweet people giving Madison's shower.... I decided to do them all different!!... that is much more fun for me .... and maybe they will enjoy seeing each others cards... I love this House Mouse stamp so I decided to go with it and see if I could make it incorporate it into a card and it not be the whole card.... sometimes that is hard for me!!...
CRICUT
Wild Card
Rose cut @ 2 inches using the real dial size feature.
Jasmine
Corners cut @ 1 inch on the real dial size feature.
Opposites Attract
"thanks" cut @ 1 inch (I think 80% sure).
To color the stamp I used colored pencils and I blended them with a blending stump but did not use gamasol...I liked the bolder color I got without the gamasol.


Wednesday, March 18, 2009

Hello Fish

I was in Gatlinburg this weekend with my son, John-Robert...pictures of us snow-tubing is below the picture of this card on my blog....of course I had to visit the Scrapbook Superstore and he was such a great sport about that!!... anyway I got me some paper and brads and paper... I loved this fish paper and all I could think of when I got it home was that cute little fish on Animal Kingdom.... this is a simple card but it so fit the paper... hope you like... thanks for looking ... ~~Jeannie

CRICUT
Animal Kingdom
Fish cut @ 3 inches... once on layer once on regular cut.
Beyond Birthdays
"hello" cut @ 2 1/2 inches... its the hello friend cut...I cut away the friend part.
Jasmine
Corners cut @ 2 1/4 inches on real dial size with the shadow feature.
Wild Card
Swirl cut @ 3 1/3 inches.... its white... just below the hello... its hard to see in the picture.


Wednesday, February 11, 2009

Robby's Valentine

I was so excited when I decided what to do with this paper and exactly how I wanted to make Robby's Valentine Card... I wanted it to be special!!... because Robby is the love of my life, and has been for the last 29 years.... he spoils me rotten, still holds my hand, he lights up when I walk in a room...and I light up when he walks in a room... he still makes my heart pitter patter... he always kisses me good-bye and walks me to the car when I leave the house first... and the list goes on and on... I love him with all my heart!! ... I hope he loves his card!!... TFL~~Jeannie
CRICUT
Fabulous Finds
Tab cut @ 1 inch on stretched feature.
Jasmine
Corners cut @ 2 1/4 inches on shadow and real dial size.
George
Heart cut @ 3 1/2 inches 3 times...pop dotted twice.
CUTTLEBUG
With Love border folder.
BASICGREY PAPER
Periphery
I used Gamasol and a red colored pencil to color the roses red.


Wednesday, December 17, 2008

Congratulations Cory

This is a card I made for my soon to be Son-in-Law... he is graduating form Jacksonville State University Friday night with a degree in Criminal Justice... we are very proud for him... I made the card with the books because he loves books so much.... its so important to me that he loves this card... wish me luck... ~~Jeannie
CRICUT
Locker Talk
Books cut @ 3 3/4 inches,
once on shadow blackout.. once on regular feature and once on layer feature.
I pop dotted the adhered the top two layers together and pop dotted them form the shadow layer... and added the book lines with a sharpie...lots of ink for ageing.
Cap cut @ 1 1/2 inches
twice on shadow blackout feature.
I trimmed the tassel away on both layers and the bottom of the cap away from the top layer.
I pop dotted the top of the cap from the bottom layer.... added a handmade tassel with a brad.
Alphalicious
"Congrat ulations" cut at 3 inches.
Jasmine
Corners cut at 2 1/2 inches
on real dial size and with the shadow feature.
Stitching with off white thread...lots of inking and some doodling.
side
close up
Inside

Blog Widget by LinkWithin
Thank you so much for signing my Guestbook... I have no idea how to reply to people who do sign in... but I so love it when you do!!... So thank you so much!... if you ever have any questions you can email me @ winacard@gmail.com. I will be happy to answer any questions you might have.

Thank you again for signing my Guestbook~
Jeannie

Please Sign In