Designed by Jeannie Phillips ~ Southside, Al
Click on any picture to enlarge.
The Gypsy File is available for this card by email. Just copy and paste this email to your personal email account winacard@gmail.com and let me know which Gypsy file that you are wanting.
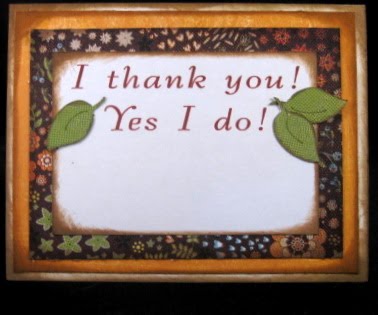
This is my
BBTB2 DT card for this week… we were to use the owl on Storybook… and I have been playing with my
Cri-Kits pens A LOT lately…this is what I came up with… it was one of those cards that I wasn’t sure I liked when I first finished it…and looked at it the next morning and went “wow! I think I really like this one!”… I hope that you like it too… its going to the CHA Show with the folks at
Cri-Kits… they liked it… thank goodness!!… I didn’t have time to do a video on this card… If you watch the video on Café Anniversary (see right side of my blog) it will explain how to do the pens on layers. I hope everybody has a wonderful day!… be sure and check out all the other wonderful cards over at
BBTB2. Hugs!
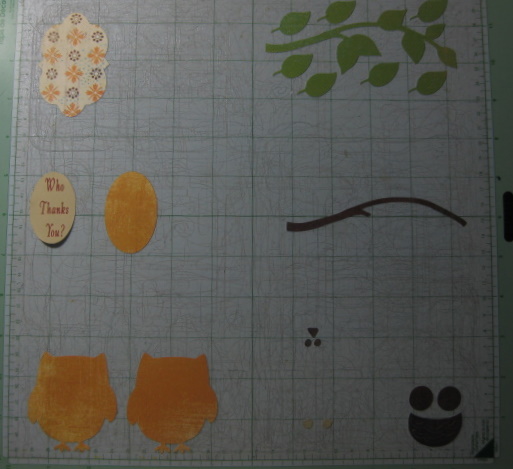
CRICUT, GYPSY & CRI-KITS PENS
(There are no Cricut instructions for this card…I didn’t know how to get the drawn objects in the right place without a Gypsy.)
Layer 1 (the ink layer) Cut/draw this layer first.
You will need your Cri-Kits pen housing and a black Cri-Kits pen for this layer.
Songbird
“to be” cut/drawn @ h 0.91 set the height and the width will right.
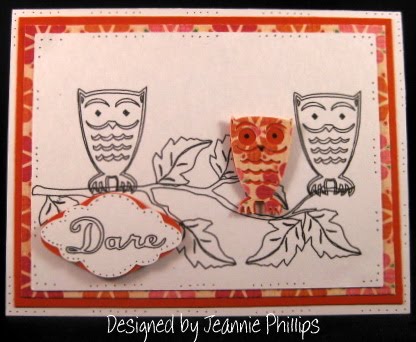
“Dare” cut/drawn @ h 0.63 set the height and the width will be right.
You will have to overlap and weld and group these words together.
Storybook
Owls cut/drawn @ w 0.93 x h 1.35.…I put the regular cut on top of the shadow cut to cut /draw the Shadow is cut/drawn @ w 0.99 x h 1.36
Dreams Come True
Leaves cut/drawn @ w 0.74 x h 0.75 and w 0.57 x h 0.58 and w 0.63 x h 0.65...I just eyed these sizes and changed them with the button that make objects smaller or larger.
Home Décor
Branch cut/drawn @ w 3.87 c h 2.41
After you draw this layer … choose add to design.. Do NOT choose unload mat…. Slip a scrap piece of paper under your pen housing when you remove it… put in your blade housing… choose Layer 2 on your mat then cut Layer 2.
Layer 2 (cut layer)
George rectangles for background pieces cut @ w 4.75 x h 3.50 .. You will have to unlink the width and height and set real dial size to get the right dimensions for this cut… be sure and re-link your width and height and deselect your real dial size for the rest of the cut pieces.
Once Upon a Princess (tag feature)
Rectangle top tag piece and the scalloped rectangle tag piece cut @ h 1.12..set the height and the width will be right…. Place your word “Dare” over the rectangle piece.
Storybook
Owl cut @ w 0.93 x h 1.35... I added circles from George around its eyes… they are cut @ 2 0.28 x h 0.26..do NOT weld these in so they will cut out.
Owl’s shadow cut @ w 0.96 x h 1.31.
Songbird
Different cut @ h 1.10...set the height on the letters and the width will be right…you will have to overlap these and weld and group them together.
Card base is 4 ¼ x 5 ½, Frame Piece 4 x 5 ¼ , Background piece 3 ½ x 4 ¾… these cuts are on the inside and outsides of my cards.
There is now a link at the bottom of each post where you can show off your recreation of my cards… with a link back to your card on your blog, or the Cricut Message Board or a photo storage place like Photo Bucket…. I would love it if you share your recreations with me! It just makes me happy!! Thank you so, so much! Hugs
I love sharing the instructions and files for my cards but I do ask that if you use my instructions or files to recreate my card and place it on your blog or somebody else’s blog that you give me the credit for the original design. I also ask that you do not submit my designs for publication, profit or for any contest. Thank you!


.jpg)


