


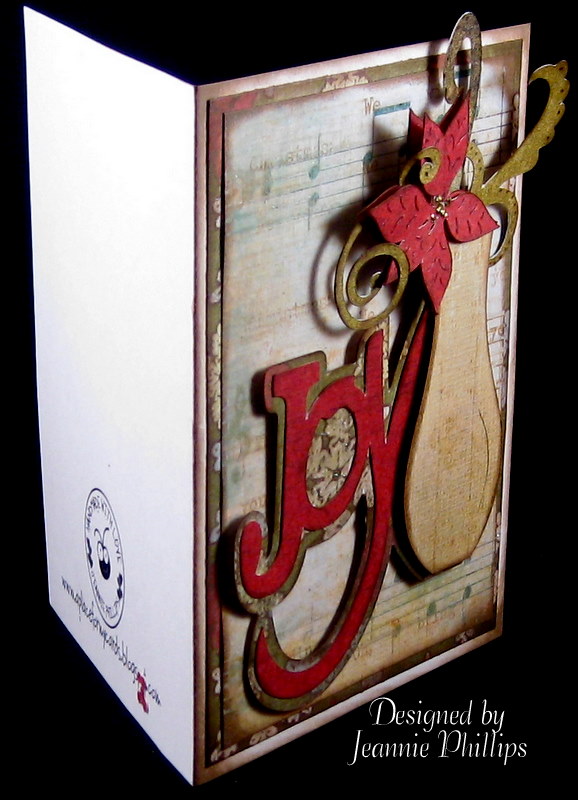
Designed by Jeannie Phillips - Southside, AL
Click on any picture to enlarge. Southside, Al
Click on any picture to enlarge. Southside, Al

I was at Wanda's the other day...she had instructions on how to make this adorable little elf with punches from Stampin-Up... they were just adorable... but you know me... I am a Cricut person through and through!!..so I had to get out my Gypsy and make one on the same principal but with my Cricut cartridges... I was excited with how it turned out... if I make it again I will weld the collar piece to the "card" card piece so it will stand up right... I hope you like it... thank you so much for looking. Hugs and Merry Christmas, Jeannie
CRICUT & GYPSY
Storybook
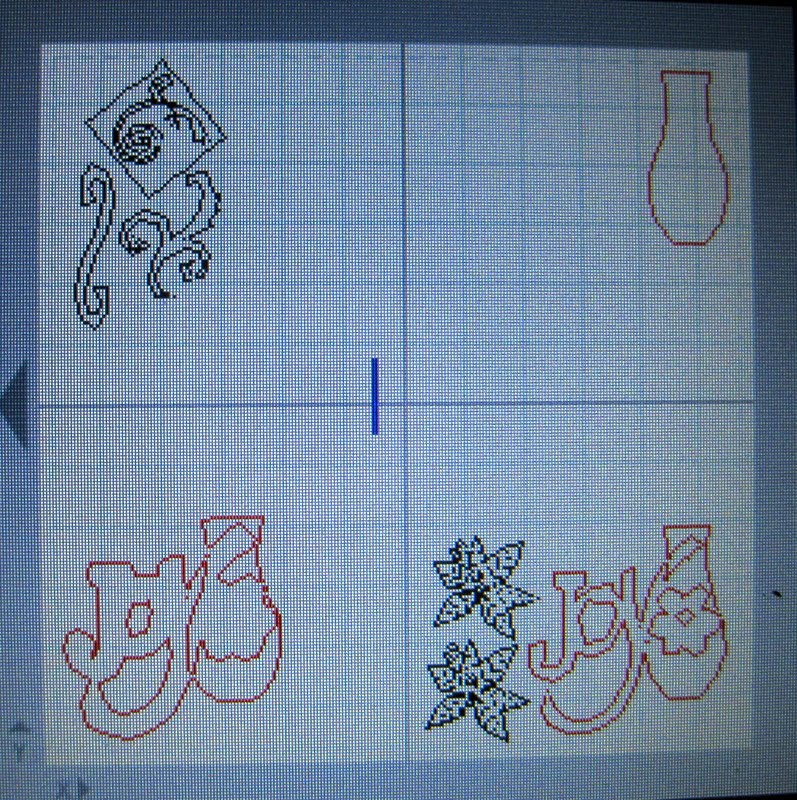
Bookplate Shapes cut @ w2.80 x h 4.o ...On the Cricut I would cut this at 4 inches.
I also cut an extra bookplate shape for the inside of the card...this is cut @ w 2.43 x h 3.47 ...on the Cricut I would cut this piece at 3 3/4 inches.
Pooh &Friends
Santa Hat and its layers cut @ h 3.o the width will be right if you set the height...on the Cricut I would cut this @ 3 inches (I think).
Paper Doll Dress Up
Hair cut @ w 3.27 x h 4.54... you will have to unlink the width and height to get the size.... On the Cricut I am not sure what to cut this at because I stretched it both way on my Gypsy.
George
Triangles for collar cut @ w 2.32 x h 0.81..I again unlinked the width and height to get this shape and welded the shapes together... using the Cricut you could use 2 ovals for the collar.
Ovals for eyes cut @ w 0.59 x h 1.11 I cut the skin colored one in half...on the Cricut I would cut these @ 1 inch or maybe 1 1/4 inches.
Circles for eyes (which look like diamonds in the picture) cut @ w o.54 x h 0.51... on the Cricut I would cute these at 1/2 inch.
Circle for nose cut @ w ).49 x h 0.45 ... on the Cricut I would cut this @ 3/4 and inch.
Hearts for ears cut @ w 1.66 x h 1.30 and welded to the Bookplate shape ... on the Cricut I would cut the hearts @ 1 1/4 inch you will just need one cut in half and glued from the back.
For the card shape I welded the hearts to the book plate cut then grouped and duplicated this and flipped the duplicated piece up and placed it just overlapping to make the card.
If using the Cricut I would cut an extra bookplate and score it 1/2 inch from the top..and only adhear it above the score line to make a card.


All images in red are welded.


.jpg)


