


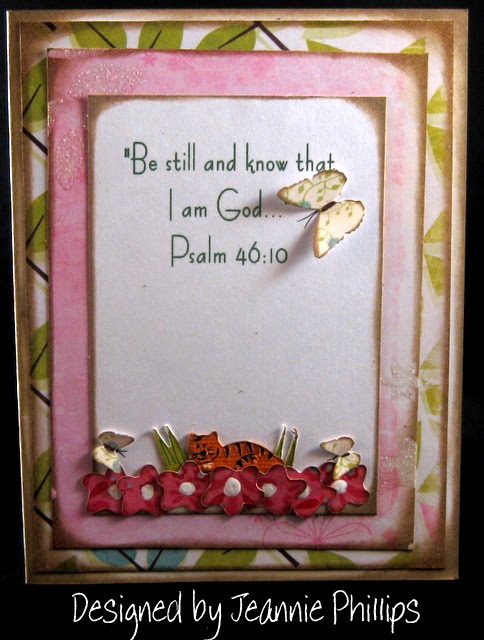
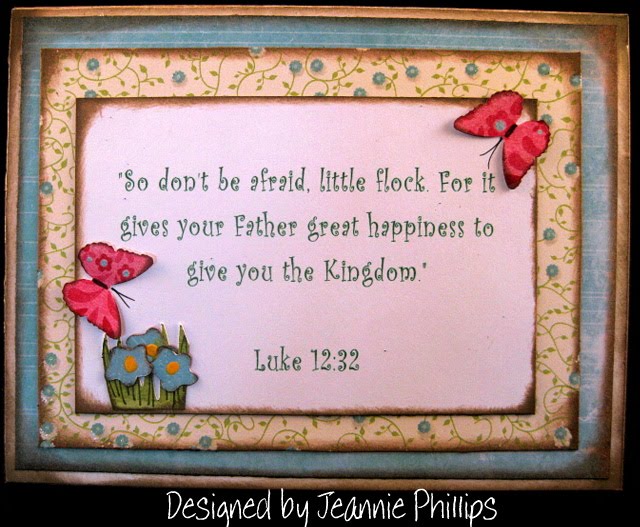
Designed by Jeannie Phillips ~ Southside, Al
Click on any picture to enlarge.

There is a instructional VIDEO at the bottom of this post.
The Gypsy File is available for this card by email. Just copy and paste this email to your personal email account winacard@gmail.com.
This card is a Vicki/Jeannie challenge… we decided to use raindrops from A Child’s Year… I haven’t seen Vicki’s card as I write the and I am so excited to do so!!… Here is a link to her blog! So be sure and check out her card…. I was just too excited when I finished this card… I was excited about the depth… and the feeling it gave me… I so hope that you like it too… thank you in advanced for your comments… they brighten my day and keep me going!!… Hugs and Love, Jeannie
GYPSY & CRICUT
A Child’s Year
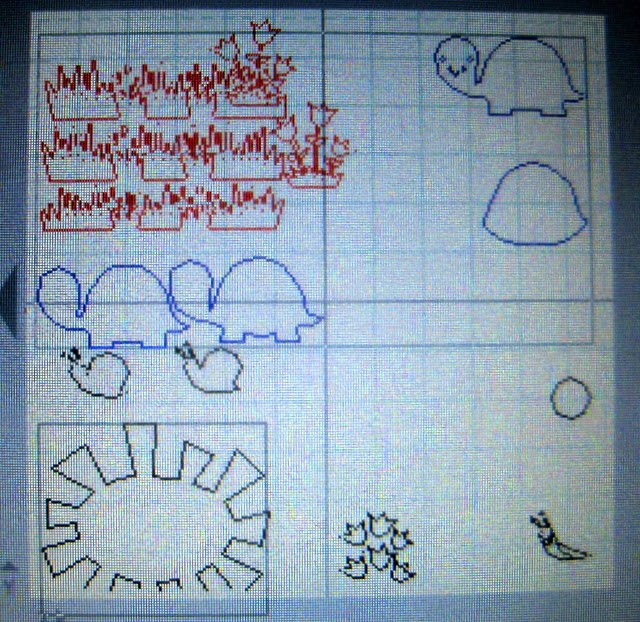
Raindrops cut @ w 0.43 x h 0.86 …. On the Cricut I would cut these @ ¾ an inch.
Doodle Charms
Puppy dogs(2) and its shadow blackouts(2) and its layers (1) cut @ 5 1.50 x h 1.22.… I welded the shadow blackouts to the dog houses see mat shot…. On the Cricut I would cut these @ 1 ¼ inches using the Cricut I would still cut the puppy dog shadows I would glue them to the dog house by the ears and put pop dots behind them.
Sun cut @ w 2.02 x h 1.64... on the Cricut I would cut this @ 1 ½ inches.
George
Puppy feet… I used an oval and 4 tiny circles…I welded the circles to the oval for the toes…. The oval is cut @ w 0.27 c h 0.37 and the circles are cut @ w 0.11 x h 0.10... Using the Cricut I would leave the feet out or make the cutting out an oval at ½ and inch and using a whole punch for the toes.
Paper Pups
Dog Houses cut @ w 2.71 x h 3.16 … on the Cricut I would cut these @ 3 ¼ inches. …I welded a rectangle from George to the opening of one of the dog houses this rectangle is cut @ 1.28 x h 1.73... On the Cricut you can cut this rectangle out separately and glue to the backside of the doghouse…. One of the dog houses is off the page because all I needed from that piece is the roof line…which is popped from the top dog house…. The video explains all of this really good.
Easter 2010
Grass cut @ w 1.97 x h 1.29...on the and w 1.77 x h 1.15...you will have to unlink the width and height to get these measurements … On the Cricut I would cut these @ 1 inch and 1 ¼ inches and trim the length to the size I needed.
Create a Critter
Flowers and their layers cut @ w 1.20 x h 1.34...I welded two of these to the front shorter pieces of grass… on the Cricut I would cut these @ 1 ½ inches.
Card base is 4 ¼ x 5 ½, Frame Piece 4 x 5 ¼ , Background piece 3 ½ x 4 ¾… this cuts are on the inside and outsides of my cards… Sentiment piece 2 ¾ x 4 inside only….. I cut all of these with my paper trimmer.
The Paper Packs I used for this card are shown on my video.


.jpg)


