Thank Your For Stopping By

Thank you so much for stopping by to visit my blog... it is changing as I change and learn more things... I hope after Christmas to get an opportunity to make some more CARDS. I am loving Loom Knitting now... and have lots to do before Christmas....I don't mind sharing how I do things and if you have questions you can E-MAIL me @ winacard@gmail.com and I will be happy to answer any questions that I have.


Friday, July 9, 2010

Drumb Roll .... AND THE WINNER IS....

ANGELA
Angela said...

Jeannie, Your videos were so much fun to watch and very informative. I knew about the little "preview eye" but had not thought to use it like you showed us in your videos. I'm sure your daughter will love her anniversary card. I love the cafe cut, I'm going to try that cut with the old cricut markers. Hoping I win your great giveaway!!

Congratulations Angela... Please e-mail me at winacard@gmail.com   
And leave your full name and address so that I can get this wonderful fun toy in the mail to you!!... I would love to see the first thing that you make!!!
*I need  your information by Monday, July 12th or I will draw another name.
Hugs, Jeannie

Blog Give-A-Way!!! New Card Post Below This Post Until After Give A Way!!

I will be giving away all the pens and housing that you see in the picture below!!!...How exciting is that!  These Pens are from Cri-Kits.com and are wonderful...just click HERE to check out their website!!

To win all you have to do is Watch Both Videos on Cafe Anniversary and and leave a  detailed comment about the video's... scroll down a bit for the videos or just click HERE FOR VIDEO 1 AND HERE FOR VIEDO 2...(I promsie you will learn a lot for these videos!)   I will do a random drawing  early FRIDAY, JULY 9TH!... if you don't have a blog you must leave me a way to contact you if you win... the winner will have until Monday July 12 to email me their address if I don't receive the address I will draw again on Tuesday.  Good Luck!!...I am so excited to be able to give the wonderful pens away on my blog!!!

Sunday, July 4, 2010

Monogram/Butterfly ~ How to Video

Designed by Jeannie Phillips ~ Southside, Al
Click on any picture to enlarge.
There is a instructional VIDEO at the bottom of this post.
The Gypsy File is available for this card by email. Just copy and paste this email to your personal email account winacard@gmail.com and let me know which Gypsy file that you are wanting.

Oh I am still playing with my Cri-Kits pens… www.cir-kits.com … I am loving these… this is a card I made for my step-mom for her birthday… her name is Gail…thus the G… I hope that she loves it… I hope to play with my pens some more then start intergrading them into my card making style more naturally…but for now I am just having a blast!

Oh and some exciting news for me…I am so excited… Dru from Cri-Kits has asked me to send her some of my cards using the Cri-Kits pens for them to show off at the CHA Show in Chicago!… What an honor is that!!… if you are there please stop by and tell them I said hi!

CRICUT, GYPSY & CRI-KITS
Layer 1 (cut pieces)
George
Rectangles .. Large cut @ w 4.75 x 3.5 .. Small w 1.90 x h 2.47... These cuts are on real dial size and you have to unlink the width and height to get both of these sizes.
*be sure to re-link your width and heigh buttons and de-select the real dial size for the rest of this card.
Circles (for tag)Large w 0.89 x h 0.83 .. Small w 0.80 h 0.75
Once Upon a Princess
Butterfly layer (its body) cut @ h 2.23..set the height and the width will be right… this butterfly body came from a different butterfly cut than the one we use it on in the card.
Tag and its layer (shift key) cut @ h 1.34 .. Set the height and the width will be right for both cuts.
Layer 2 (drawn pieces with Cri-Kits)
Once Upon a Princess
Butterfly cut @ w 2.09 x h 4.03.
Cindy Lou
Swirlssmall for the tag cut/drawn @ w 0.74 x h 0.38 duplicate and flip up for the second small swirl .. Large for the inside of card cut/drawn @ w 1/35 x h 0.69.
Jasmine
“G” cut @ w o.45 x h 0.94.
Gypsy Wanderings
“Happy Birthday” cut @ w 2.51 x h 1.71.

Card base is 4 ¼ x 5 ½, Frame Piece 4 x 5 ¼ , Background piece 3 ½ x 4 ¾… these cuts are on the inside and outsides of my cards… Sentiment piece 3 1/2 x 4 3/4  inside only….. I cut all of these with my paper trimmer.

There is now a link at the bottom of each post where you can show off your recreation of my cards… with a link back to your card on your blog, or the Cricut Message Board or a photo storage place like Photo Bucket…. I would love it if you share your recreations with me! It just makes me happy!! Thank you so, so much! Hugs


I love sharing the instructions and files for my cards but I do ask that if you use my instructions or files to recreate my card and place it on your blog or somebody else’s blog that you give me the credit for the original design. I also ask that you do not submit my designs for publication, profit or for any contest. Thank you!


Thursday, July 1, 2010

Cafe Anniversary ~ How to Video Part 1

Designed by Jeannie Phillips ~ Southside, Al
Click on any picture to enlarge.

There is a instructional VIDEO PART 1.. at the bottom of this post… VIDEO PART 2 IN NEXT POST.
The Gypsy File is available for this card by email. Just copy and paste this email to your personal email account winacard@gmail.com and let me know which Gypsy file that you are wanting.

This is an anniversary card that I made for my daughter, Madison and her husband, Cory for their 1st anniversary…I used one of my Cri-Kits pens from http://www.cri-kits.com/ . I am having so much fun with these pens!… If you are interested in how to use the pens to make them line up just right be sure and watch both videos.. There is a part 1 and a part 2. I hope that you love this card…it is simple but I thought that the simplicity of it is what added to its charm. Thank you so much for looking!!

CRICUT, GYPSY & CRI-KITS
(There are no Cricut instructions for this card.)
Layer 1 (on Gypsy)
Sweethearts
Couple at table cut @ w 1.91 x h 1.94.
Heart and it couple layer cut @ w 1.55 x h 139.
Shadow Heart cut @ w 1.69 x h 1.47
My Community
Café Shadow cut @ w 4.83 x h 5.50... Duplicate this and flip it side to side over lap a little and weld pieced together to make the shaped card.
Layer 2 (on Gypsy)
Café Shadow drawn @ w 4.83 x h 5.50
Layer 3 (on Gypys)
Café cut (regular cut) cut @ h 5.50...set the height and the width will be right.
Layer 4 (on Gypsy)
Sweethearts
Happy Anniversary" drawn @ w 2.72 x h 1.20
Jasmine
“1” cut @ w 0.20 x h 1.50
“s” cut @ w 0.15 x h 0.66
“t” cut @ w 0.26 x h 0.57


There is now a link at the bottom of each post where you can show off your recreation of my cards… the link to this card is below the Part2 Video... this will link back to your card on your blog, or the Cricut Message Board or a photo storage place like Photo Bucket…. I would love it if you share your recreations with me! It just makes me happy!! Thank you so, so much! Hugs

I love sharing the instructions and files for my cards but I do ask that if you use my instructions or files to recreate my card and place it on your blog or somebody else’s blog that you give me the credit for the original design. I also ask that you do not submit my designs for publication, profit or for any contest. Thank you!

Video Part 2  next post or click HERE

Cafe Anniversary ~ How to Video Part 2


Part 1 video in previous post or click HERE

Wednesday, June 30, 2010

Happy Birthday Human ~ With Cri-Kits ~ How to Video

Designed by Jeannie Phillips ~ Southside, Al
Click on any picture to enlarge.
There is a instructional VIDEO at the bottom of this post.
The Gypsy File is available for this card by email. Just copy and paste this email to your personal email account winacard@gmail.com and let me know which Gypsy file that you are wanting.

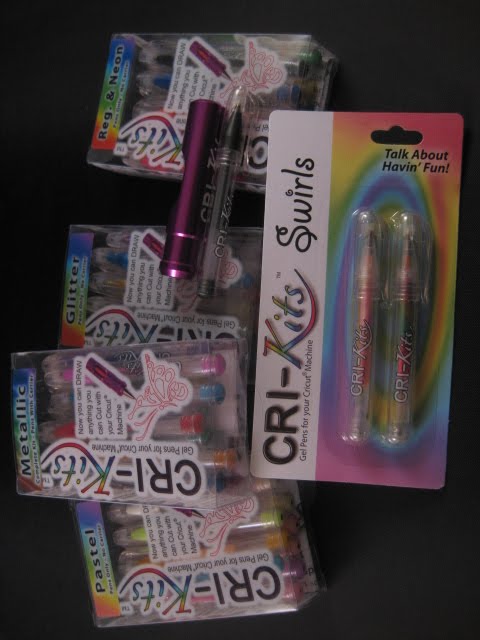
I am so excited about this card.. I got to use a new product by Cri-Kits …their cool pens… I have a picture of below!!…that you can use with your Cricut to write or draw anything that you can cut…and the Gypsy makes it so so easy to put all these in just the right place!!… I can’t wait to try out new things!!…I have ideas flowing in my head!!…and later this week…Friday I am hoping …I get to give away 42 of these pens along with the housing that holds the pens!!… how exciting is that!!

I made this card for my sweet son-in-law Cory…his birthday is July 4th…now I have to Priority Mail the card…because I was waiting on my pens to make this card… Once I laid out this card for him... I didn't want him to make another one... this one just seemed so much like a card he would like!! I so hope he loves this card.
.
CRICUT, GYPSY & CRI-KITS ( I love my Cri-Kits)
Layer One (for this file on my Gypsy)
George
Square .. For template.. w 3.75 x h 5.0 .. I did hide contour with this cut…and just laid my paper cutter pieces on the correct place on the mat to …this way I knew exactly where to lay out the pieces I was going to draw on my paper...using the Cricut you would need to cut these pieces out the right size and place them on your mat.
Tiny Rectangles…. Cut @ w 0.15 x h 0.23..there are tons of these… I used my Silver Metallic Cri-Kits pen to draw these on my mat. … Using my Cricut I would cut/draw these at h ¼ inches… move the ink pen over where I wanted each of these drawn. You will have to draw them one at a time if you use just your Cricut.
Robotz
Happy B-Day letters cut @ h 0.62...set the height and the width will be right on all letters…Using the Cricut I would cut/draw these at ½ and inch.. I would cut each letter one at a time…moving the cursor where I wanted the next letter to start..this will take practice.
Human letters cut @ h 0.54 set the height and the width will be right on all the letters… .. using the Cricut I would cut each letter one at a time…moving the cursor where I wanted the next letter to start..this will take practice.
Layer 2 (for this file on my Gypsy... use a different mat)
Robotz
Robot and all its layers cut @ h 5.33...set the height and the width will be right on all the cuts… on the Cricut I would cut these out @ 5 ¼ inches.
Card base is 4 ¼ x 5 ½, Frame Piece 4 x 5 ¼ , Background piece 3 3/4 x 5… these cuts are on the inside and outsides of my cards… Sentiment piece 2 ¾ x 4 inside only….. I cut all of these with my paper trimmer

*There is now a link at the bottom of each post where you can show off your recreation of my cards… with a link back to your card on your blog, or the Cricut Message Board or a photo storage place like Photo Bucket…. I would love it if you share your recreations with me! It just makes me happy!! Thank you so, so much! Hugs


I tried to turn this picture the right way...it just wouldn't work.


I love sharing the instructions and files for my cards but I do ask that if you use my instructions or files to recreate my card and place it on your blog or somebody else’s blog that you give me the credit for the original design. I also ask that you do not submit my designs for publication, profit or for any contest. Thank you!

Monday, June 28, 2010

I'd Wish to Be ~ Handmade Cards by Jeannie Phillips ~ How to Video

Designed by Jeannie Phillips ~ Southside, Al
Click on any picture to enlarge.
There is a instructional VIDEO at the bottom of this post.
The Gypsy File is available for this card by email. Just copy and paste this email to your personal email account winacard@gmail.com and let me know which Gypsy file that you are wanting.

This card is the card I made for the BBTB2 Design Team Challenge for this week… we were to use the Genie lamp from Paper Doll Dress Up… I thought and I thought and I though about what I wanted to do with this cut …. Then I thought of my Robtoz cartridge and knew what I wanted to do…. I was so excited with the background paper that I computer generated… I felt like it was the perfect touch for the colors. Thank you so much for looking…be sure and check out what the other DT Members came up with over at BBTB2. Hugs, Jeannie


CRICUT & GYPSY
Robtoz
Robot dog and all it’s layers cut @ w 2.70 x h 3.79...on the Cricut I would cut these at 3 3/4 inches.
I’d Wish cut @ h 0.41..set the height and the width will be right on all the letters…I welded these letters together….. on the Cricut I would cut these @ ¼ or ½ an inch they don’t have to be welded so this will work fine on the Cricut without the Gypsy.
Paper Doll Dress Up
Genie Lamp cut @ w 1.67 x h 2.41 … on the Cricut I would cut this at 2 ¼ inches.
Create A Critter
Clouds cut @ w 2.14 x h 2.26 …on the Cricut I would cut these @ 2 1/4 inches.

Card base is 4 ¼ x 5 ½, Frame piece 4 x 5 ¼ , Background piece 3 ½ x 4 ½ … these cuts are on the inside and outsides of my cards… Sentiment piece 2 ¾ x 4 inside only….. I cut all of these with my paper trimmer.

*There is now a link at the bottom of each post where you can show off your recreation of my cards… with a link back to your card on your blog, or the Cricut Message Board or a photo storage place like Photo Bucket…. I would love it if you share your recreations with me! It just makes me happy!! Thank you so, so much! Hugs


Tuesday, June 22, 2010

A Sea Monster B'day Wish

Designed by Jeannie Phillips ~ Southside, Al
Click on any picture to enlarge.
Oops on the video this time... I thought I had my camera off... it was on... thought I had it on... it was off... so no video...I messed it all up... a lesson in paying closer attention!!... smile!

The Gypsy File is available for this card by email. Just copy and paste this email to your personal email account winacard@gmail.com and let me know which Gypsy file that you are wanting.

This is my daughter's birthday card... she and her dad are in PC Florida this week...they go together ever year... (I can't get in the sun because of my Lupus and my son is at camp all summer).. they love the beach... my son and I go to Gatlinburg ever spring break...we love the mountains.  Anyway they are at the beach and Robby said Madison had been talking about sea monsters...I imagine that talk all got started because of the oil spill.. Madison's birthday is June 30th... so I knew just what kind of card I was making her this year...I so hope that she loves it!! Thank you so much for looking!  Hugs, Jeannie

CRICUT & GYPSY
Mini Monster
Sea Monster and all its layers cut @ h 2.06 set the height and the width will be right... on the Cricut I would cut this @ 2 inches.
Life is a Beach
Wave borders (3) cut @ w 3.50 x h 0.69 on real dial size!  each of these borders are welded to different height rectangle cuts.... on the Cricut I would cut these @ 3/4 and inch...I would trim this do to the width I need... you may have to cut two per layer and overlap them...glue them together and trim to a width of 3 1/2 inches.
George (unlink you width and height for these cuts)
Wave Rectangles...all are cut @ w 3.50.. here are the heights for each tall wave rectangle h 2.82, medium wave rectangle h 2.61 and small wave rectangle h 2.34... cut all these cuts on real dial size.... these are each welded to the wave cuts listed above ...see mat shot... using the Cricut I would cut these with a paper trimmer... I would cut the all the rectangles at 3 1/2 inches wide... then the heights at 2 3/4, 2 1/2 and 2 inches.
George (unlink your width and height for these cuts)
Sand cut two  welded oval  cut @ w 1.67 x h 2.20...non welded oval cut @ w 1.40 x h 2.10.  Rectangle cut @ w 3.50 x h 1.60... small rectangle on the side...not welded cut @ 3 0.30 x h 1.0  ... Using the Cricut I would cut a rectangle 3 1/2 inches x 4 inches...then I would use a wave cuter to cut the wave across the top of the cut.
Create a Critter
Happy Birthday cut @ w 2.69 x h 1.35...make sure that real dial size is not set and that your link button is yellow for this cut... on the Cricut I would cut this at 1 1/4 inch.

The bottom wave is adhered directly to the background piece...then the sea monster's tail is adhered to that... pop dot the middle wave from that...and the top wave is pop dotted from the middle wave... adhere the sand (after you have added the happy birthday, and glitter) to the top wave... adhere the sea monster's head to the water above the wave.

Card base is 4 ¼ x 5 ½, Frame Piece 4 x 5 ¼ , Background piece 3 ½ x 4 ¾… these cuts are on the inside and outsides of my cards… Sentiment piece 2 ¾ x 4 inside only….. I cut all of these with my paper trimmer.


There is now a link at the bottom of each post where you can show off your recreation of my cards… with a link back to your card on your blog, or the Cricut Message Board or a photo storage place like Photo Bucket…. I would love it if you share your recreations with me! It just makes me happy!! Thank you so, so much! Hugs

I love sharing the instructions and files for my cards but I do ask that if you use my instructions or files to recreate my card and place it on your blog or somebody else’s blog that you give me the credit for the original design. I also ask that you do not submit my designs for publication, profit or for any contest. Thank you!


Saturday, June 19, 2010

Our Monsters ~ With Video

Designed by Jeannie Phillips ~ Southside, Al
Click on any picture to enlarge.
There is a instructional VIDEO at the bottom of this post.
The Gypsy File is available for this card by email. Just copy and paste this email to your personal email account winacard@gmail.com and let me know which Gypsy file that you are wanting.

I just have to tell you this card stumped me all week long… all week!!… I have been frozen about making this card and it has kept me from making a card all week long!!… it is the first time that I used mini monsters.. Which I love!! And I just let these little fellows get the best of me…. I do suggest that you cut a couple of these out in larger sizes to practice on, it will get it all clear in your head and be less intimidating!.. They really aren’t hard… once you make one for the first time.

This card is for my dear husband for Father’s Day…I hand did the inside to remind him of when our grown up kids were just little kids…I so hope that he loves it.

*There is now a link at the bottom of each post where you can show off your recreation of my cards… I would love it if you share your recreations with me! You can add your picture from your blog, the Cricut Message Board, or a photo storage place like Photo Bucket….Thank you so, so much for looking!  Don’t forget to add your pictures!!!… that just makes me happy!!
Hugs, Jeannie
CRICUT & GYPSY
*Cricut cuts or this card are not included because of all the welding and other changes on this card.
Mini Monsters
The word “Monsters.” its shadow cut and its layer cut  cut @ w 4.59 x h 1.99...to get this measurement you will have to unlink the width and height… weld the shadow cut of the Monsters to the shadow cut of the word monster… see mat shot below.
Monster with wings and all it’s layers cut @ h 1.52..set the height and the width will be right…be sure and re-link your width and height first.
The other Monster and its layers  cut @ h 1.52...set the height and the width will be right.
Gypsy Font
“our” and its shadow cut @ h 1.49 set the height and the width will be right… I welded the u and r together on the shadow first then on the letters … I welded the shadow cut of our to the phrase cut of Monsters.
Card base is 4 ¼ x 5 ½, Frame piece 4 x 5 ¼ , Background piece 3 ½ x 4 ¾… these cuts are on the inside and outsides of my cards… Sentiment piece 2 ¾ x 4 inside only….. I cut all of these with my paper trimmer.

On the Video for this card (at bottom of this post) I try to explain the layering really good…I hope it helps you!

I love sharing the instructions and files for my cards but I do ask that if you use my instructions or files to recreate my card and place it on your blog or somebody else’s blog that you give me the credit for the original design. I also ask that you do not submit my designs for publication, profit or for any contest. Thank you!


Blog Widget by LinkWithin
Thank you so much for signing my Guestbook... I have no idea how to reply to people who do sign in... but I so love it when you do!!... So thank you so much!... if you ever have any questions you can email me @ winacard@gmail.com. I will be happy to answer any questions you might have.

Thank you again for signing my Guestbook~
Jeannie

Please Sign In