Thank Your For Stopping By

Thank you so much for stopping by to visit my blog... it is changing as I change and learn more things... I hope after Christmas to get an opportunity to make some more CARDS. I am loving Loom Knitting now... and have lots to do before Christmas....I don't mind sharing how I do things and if you have questions you can E-MAIL me @ winacard@gmail.com and I will be happy to answer any questions that I have.


Showing posts with label Happily Ever After. Show all posts

Sunday, May 2, 2010

A Perfect Summer Day w/videos Parts 1&2

Designed by Jeannie Phillips ~ Southside, Al
Click on any picture to enlarge.
There is a instructional VIDEO at the bottom of this post.

The Gypsy File is available for this card by email. Just copy and paste this email to your personal email account winacard@gmail.com.

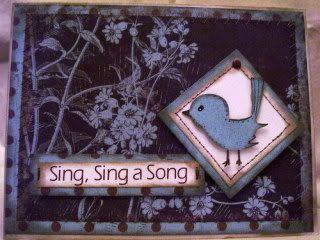
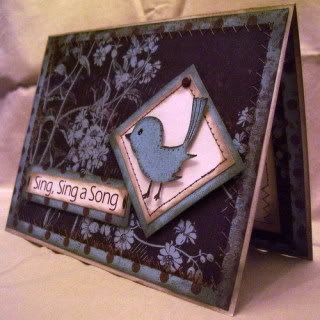
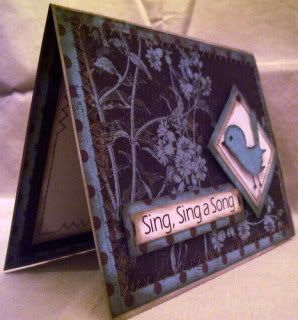
I have been thinking all day on a Mother’s Day card for my mom… I keep being nudged to go look at my papers…. Did I listen… not at first… I kept going through my Gypsy looking at my cuts…nothing was coming to me…. God kept nudging me to go look at my papers… when I did just that there it was the card I needed in my first stack of papers…when I saw the papers I knew exactly what I wanted to do!!… next time I will listen… I hope!… thank you so much for looking… I love your comments.. Be sure and check out the video… it’s a two part video…because my battery ran out of power in the middle. I am learning!!!.. Hugs, Jeanne

GYPSY & CRICUT
Stretch Your Imagination
Birdhouse, its shadow and its layer cut @ h 3.28 set the height and the width will be right… on the Cricut I would cut these @ 3 ¼ inches.
Happily Ever After - Disney
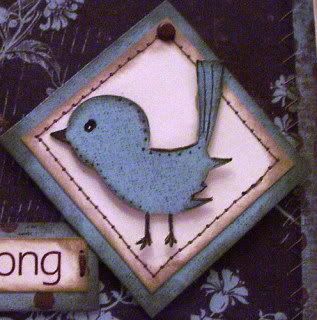
Birds and their layer cut @ h 1 inch .. Set the height and the width will be right… on the Cricut I would cut these @ 1 inch.
Zoobaloos
Branches and their layers cut @ h 1.32 ….set the h and the width will be right… I flipped two of the branches up…and welded two together… see mat shot below….on the Cricut I would cut these at 1 ½ inches.
Give a Hoot
Leafs cut @ w 0.84 x h 0.53 …I used the extra leaves to add to the branches and behind the birdhouse…see video …on the Cricut I would cut these @ ½ an inch.


Friday, July 24, 2009

Little Bird of Hope

This card had to be special...and was such a labor of love!!... a friend of mine at work, Brittney her mom just found out she has Breast Cancer.... he mom is 54 I think...she need our prayers!!... Brittney wanted a special card for her mom and her mom loves birdhouses .... this is what I came up with...been working on it all morning I hope that she likes it... Please keep B's mom in your prayers!... thanks for looking... !
Hugs
Jeannie
CRICUT
Stretch Your Imagination
Birdhouse cut @ 5 1/2 inches on the stretch feature.
I cut it three times on regular cut once on layer to pop it from the page.
Pooh & Friends
Branch cut @ 7 inches and 6 inches on the layer feature.
Paper Doll Dress Up
Vine cut @ 1 3/4 inches 2 times and one time 2 1/4 inches.
It is on the paper doll wedding page.
Happily Ever After
Bird cut @ 1 1/2 inches using both cuts.
Stand and Salute
Pink ribbons cut @ 1 inch and 1 1/2 inch...on regular and layer cut.

Friday, May 1, 2009

A Garden To Sing In

Designed by Jeannie Phillips
Southside, Al
I totally went with the paper on this one...at first it stumped me.... I was at a loss... picked out all the paper and then I just didn't think I was going to be able to put anything together.... I was really frustrated.... and I wanted to make a card...I so loved the paper... so I stepped back and said ok God... please give me a card... took a few deep breaths....and it just all came into place... Now if I would learn to give Him the big things!! .... Thanks so much for looking...and I do love your comments... one never gets tired of comments!!... Hugs Jeannie
CRICUT
Stretch Your Imagination
Swirles cut @ 3 inches for the outside and 2 inches for the inside.
Happily Ever After
Bird cut @ 2 1/2 inches.
Walk In My Garden
Flowers cut @ 1 1/2 and 1 inches (I think).
Circles cut @ 1/2 and 3/4 inch (I think).
Chalking and Inking for Highlights
Scor-It for the score lines. I am loving that Scor-It tool for sure!

Monday, March 30, 2009

This is another card that came to me Friday or Saturday one.... I was excited when I started it... I still have one more card in my head that I can't wait to make.... then I will have to start saying my prayers and my thank yous for more card ideas..... When I am all blank and I want to make something.... I ask God for ideas when I say my prayers and then I tell Him thank you because I know that He will send me some.... when I learned to do that that is when my card ideas just started coming to me.... thank you so much for looking... Hugs ~~Jeannie
CRICUT
Paper Doll Dress Up
Wagon cut at 2 1/4 inches.
Walk in My Garden
Pot cut @ 1 1/4 inches.
Happily Ever After
Tree cut @ 3 inches.
50 States
Yellow Hammer bird cut @ 1 1/2 inches.
Zoobaloos
Grass cut @ 1 1/4 inchs on real dial size and layer feature.
Lots of shading with chalk...I am learning to do that and loving it!!! ..I had began to use more chalk and Sherri Benson and her Tulip card inspired me to do it more and more... I even got me some paint brushes to apply my chalk with.. Thank you Sherri!... Lots of inking... and tiny bits of gold Stickles for the center of the flowers.


Went back and added Stickles to the center of these flowers... Noticed I forgot after the post.

Tuesday, February 17, 2009

Sharon's Birthday Card

I made this for Sharon... a really good friend of mine at work...she is such a sweetheart.... we have a kindred spirit.... she is really dear to me and such a fun person to be around... work is just not the same when she isn't there!!... She loves horses and tomorrow is her Birthday... I did this one in a big hurry this morning!!!... probably my first ever 30 minute card!...Thanks for looking.. ~~Jeannie
CRICUT
Happily Ever After
Horse cut @ 3 inches.
The moon was cut with a circle cutter.
Basic Grey Paper
Lots of ink.


Tuesday, January 20, 2009

Love Grows

I have been wanting to use this tree with this paper for a while now.... but just couldn't come up with a complete card .... until I looked at it today .... and with all the Valentine cards floating around I couldn't help but think hearts ... and when I did I was so grateful ... when I came up with this saying to go with it it just made my heart happy .... I hope you love it!! ~~Jeannie

CRICUT
Happily Ever After
Tree cut @ 3 1/4 inches.
George
Hearts (10) cut @ 1/4 inch.
MARTHA STEWART
Owl Punch
RAK'd to my by Margie aka Bella Bug
Thank you so much Margie
CUDDLE BUG
Frills Border Folder
Computer generated sentiment... used a corner punch.
Doodles, stitching and lots of ink.


Tuesday, December 9, 2008

Sing a Song!

This weeks give a way card on
I found this paper on QVC online...its really pretty...but I wish it was card-stock... it Vintage Papers from Hot Off the Press.... This piece of paper was so pretty that it didn't need much at all... hope you like it... ~~Jeannie
CRICUT
Happily Every After
Bird cut @ 1 3/4 inches on real dial size.
Lots of brown ink and stitching.


Sunday, November 9, 2008

Sending You a Hoot and a Holler

Bold
For My Daughter Madison
instructions below 2nd picture
front
I have been wanting the Happily Ever After cartridge forever.... I thought I had the right one when I bought Dreams Come True.... I love the extras on that cart too.... but... but I was wanting this Owl... I love Owls... I collect them....and this one is so pretty.... I hope you like how "she" turned out as much as I do... thank you for looking!!!... it makes me happy.... and I thrive on your comments!!!...~~hugs, Jeannie


CRICUT
Happily Ever After
Owl cut @ 4 inches.


I cut this owl Once on shadow, twice in the red with the pink dots, once on layer in the more patterned paper.. and once in black so I could cut out his eyes.... I attached the first red layer to the brown shadow layer... those are popped dotted off the background.... then the second red layer is where I attached the black of the eyes...and that layer is popped dotted from the first red layer...then the final layer, the more patterned paper is popdotted off the top red layer...

The words on the plaque are computer generated...and I used a corner punch on both of those rectangles...the plaque is popdotted from the background layer.

close up close up
side and inside view
Blog Widget by LinkWithin
Thank you so much for signing my Guestbook... I have no idea how to reply to people who do sign in... but I so love it when you do!!... So thank you so much!... if you ever have any questions you can email me @ winacard@gmail.com. I will be happy to answer any questions you might have.

Thank you again for signing my Guestbook~
Jeannie

Please Sign In