Thank Your For Stopping By

Thank you so much for stopping by to visit my blog... it is changing as I change and learn more things... I hope after Christmas to get an opportunity to make some more CARDS. I am loving Loom Knitting now... and have lots to do before Christmas....I don't mind sharing how I do things and if you have questions you can E-MAIL me @ winacard@gmail.com and I will be happy to answer any questions that I have.


Showing posts with label Encouragement. Show all posts

Monday, July 12, 2010

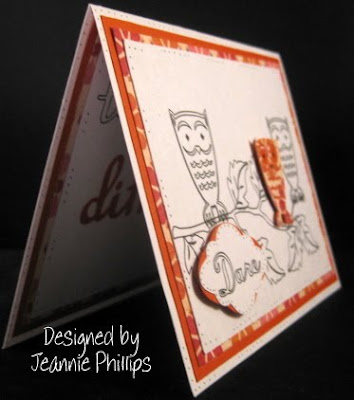
Dare to be Different ... BBTB2 Design Team Challenge

Designed by Jeannie Phillips ~ Southside, Al
Click on any picture to enlarge.
The Gypsy File is available for this card by email. Just copy and paste this email to your personal email account winacard@gmail.com and let me know which Gypsy file that you are wanting.

This is my BBTB2 DT card for this week… we were to use the owl on Storybook… and I have been playing with my Cri-Kits pens A LOT lately…this is what I came up with… it was one of those cards that I wasn’t sure I liked when I first finished it…and looked at it the next morning and went “wow! I think I really like this one!”… I hope that you like it too… its going to the CHA Show with the folks at Cri-Kits… they liked it… thank goodness!!… I didn’t have time to do a video on this card… If you watch the video on Café Anniversary (see right side of my blog) it will explain how to do the pens on layers. I hope everybody has a wonderful day!… be sure and check out all the other wonderful cards over at BBTB2. Hugs!


CRICUT, GYPSY & CRI-KITS PENS
(There are no Cricut instructions for this card…I didn’t know how to get the drawn objects in the right place without a Gypsy.)
Layer 1 (the ink layer) Cut/draw this layer first.
You will need your Cri-Kits pen housing and a black Cri-Kits pen for this layer.
Songbird
“to be” cut/drawn @ h 0.91 set the height and the width will right.
“Dare” cut/drawn @ h 0.63 set the height and the width will be right.
You will have to overlap and weld and group these words together.
Storybook
Owls cut/drawn @ w 0.93 x h 1.35.…I put the regular cut on top of the shadow cut to cut /draw the Shadow is cut/drawn @ w 0.99 x h 1.36
Dreams Come True
Leaves cut/drawn @ w 0.74 x h 0.75 and w 0.57 x h 0.58 and w 0.63 x h 0.65...I just eyed these sizes and changed them with the button that make objects smaller or larger.
Home Décor
Branch cut/drawn @ w 3.87 c h 2.41

After you draw this layer … choose add to design.. Do NOT choose unload mat…. Slip a scrap piece of paper under your pen housing when you remove it… put in your blade housing… choose Layer 2 on your mat then cut Layer 2.

Layer 2 (cut layer)
George rectangles for background pieces cut @ w 4.75 x h 3.50 .. You will have to unlink the width and height and set real dial size to get the right dimensions for this cut… be sure and re-link your width and height and deselect your real dial size for the rest of the cut pieces.
Once Upon a Princess (tag feature)
Rectangle top tag piece and the scalloped rectangle tag piece cut @ h 1.12..set the height and the width will be right…. Place your word “Dare” over the rectangle piece.
Storybook
Owl cut @ w 0.93 x h 1.35... I added circles from George around its eyes… they are cut @ 2 0.28 x h 0.26..do NOT weld these in so they will cut out.
Owl’s shadow cut @ w 0.96 x h 1.31.
Songbird
Different cut @ h 1.10...set the height on the letters and the width will be right…you will have to overlap these and weld and group them together.
Card base is 4 ¼ x 5 ½, Frame Piece 4 x 5 ¼ , Background piece 3 ½ x 4 ¾… these cuts are on the inside and outsides of my cards.

There is now a link at the bottom of each post where you can show off your recreation of my cards… with a link back to your card on your blog, or the Cricut Message Board or a photo storage place like Photo Bucket…. I would love it if you share your recreations with me! It just makes me happy!! Thank you so, so much! Hugs


I love sharing the instructions and files for my cards but I do ask that if you use my instructions or files to recreate my card and place it on your blog or somebody else’s blog that you give me the credit for the original design. I also ask that you do not submit my designs for publication, profit or for any contest. Thank you!

Wednesday, April 14, 2010

Keep Your Lamp Burning

Designed by Jeannie Phillips ~ Southside, AL
Click on any picture to enlarge.

The file for this card is available by email... just copy and paste the following email into your own email account.

CRICUT & GYPSY
Sentimental
Lamp its shadows and all 4 or its layers cut @ h 3.56... set the height and the widths will be right... the lamp shadow that isn't in red isn't welded to that small rectangle...its there to cut the right shape out in the rectangle to make the lamp layers sit right...I also liked the effect better.... on the Cricut I would cut these @ 4 inches... I wouldn't worry about the un-welded shadow cut.
Stamp shaped cuts cut @ w 1.46 x h 1.74... on the Cricut I would cut these at 1 3/4 inches.
Give A Hoot
Flourishes cut @ w 2.01 x h 0.65 ... on the Cricut I would cut these at 1/2 an inch.
Forever Young
Lady Silhouettes cut @ w 0.66 c h 1.40.. do not weld this cut to the rectangle behind it...so it will be cut out of the center.... on the Cricut I would cut these @ 1 1/4 inch in black and glue on top of the square.
George
All the rectangles are actually squares cuts with the height and width off to get the sizes I needed.
Squares welded to the lamp shadows and grouped then cut @ w 0.66 x h 1.40...lay out one of these then duplicate so they will be exactly the same... pop the first one from the background... then pop the other from that... using the Cricut I would cut these on my paper trimmer at width 3.5 x h 1 3/4 an inch and then glue the shadow into place.
Smaller Square for the sentiment cut @ w 3.41 x h 1.52...place the lamp shadow over this... in the right place... but do not weld so you get the round cut in the corner...see picture.... to line this up right I placed it over the welded pieced... the grouped and moved...using the Cricut I would cut this on the paper cutter at a little little more than 3 inches x 1 1/2 inches.
Square with the silhouette cut out cut @ w 1.19 x 1.46 ...using the Cricut would cut these with the paper cutter 1/4 inch wider and taller than your stamp cut.

*The lamp shadow that is not welded is placed off the paper some because you don't need that  lamp except for what it does to the square.


Wednesday, April 7, 2010

So Don't Be Afraid, Little Flock

Designed by Jeannie Phillips - Southside, AL
Click on any picture to enlarge.

As many of you know I often pray for my cards...and I prayed for one last night...and this morning I was reading my daily Bible reading and this verse stood out (see inside of card below for the verse)!!.... I read this verse and thought "that is a card!!..I was so so excited... then I took a nap...and it all had come together in my head... I was so excited about it when I started ... and then even more excited when I finished!!... I hope that this card touches your heart, because it was truly a gift from God... Hugs, Jeannie

CRICUT & GYPSY
Pooh and Friends

Butterflies cut @ w 0.80 x h 0.88.. I welded a George rectangle cut @ w 0.20 x h 0.27 to the bottom of the butter fly..group them ...then duplicate...flip the second one from top to bottom and rotate it... move into place and group all of these together....you are going to trim off the tail and the nose and antennas and fold this in half...and glue it in between two of the angle cuts....on the Cricut I would cut 2 butterflies @ 1 inch.. glue the bodies together.. trim off the tail and the nose and antennas and glue that little part together... then glue this between two of the baby bodies.
New Arrival
Baby cut @ w 1.20 x h 1.42...on the Cricut I would cut this at 1 1/2 inches.
Paper Doll Dress Up
Angel's Hair is Raggedy Andy's hair cut @ w 1.29 x h 2.42...weld three of these onto the babies heads cut the fourth one in yellow..... on the Cricut I would cut this @ 1 inch...I think that will work... you can glue these to the baby's heads if using your Cricut.
Lamb cut ! w 2.35 x h 3.42...I cut two in white and one in black on the white ones I trimmed off the face and legs..on on the top white one I trimmed off the tail...I use the Swirls Cuttlebug Folder for the embossing... I put the white layer with the tail directly on the black cut...and popped the other layer from that...the sheep is also popped from the background...on the Cricut I would cut these @ 3 1/2 inches.

Easter 2010

Short Grass cut @ w 1.59 x h 1.09 x h there are four of these pieces to make a grass layer... I flipped two and welded and grouped them together to get the length I wanted.. which was 4.75 inches...

Tall Grass is the complete piece of short grass duplicated.. flipped side to side and change the height to....h 1.59...
 on the Cricut I would cut 4 for each row of grass.. and overlap them to create the grass..cutting one set a 1 inch and the other two sets @ 1 1/2 inches.
Walk in My Garden
Flowers (shadow blackout cut) cut @ w o.48 x h 0.39 ...I cut placed a total of 24 of these on the mat... twelve of them are welded to the grass to give a good place to glue the actual flowers and 12 I cut out in blue to match the flowers on my paper....on the Cricut I would cut these at 1/4 and inch and cut only 12 in the color of your choice and glue directly to the grass layers.
Ladybug and its layer cut @ 2 1.32 x h 0.89...on the Cricut I would cut this at 3/4 an inch.


Thursday, April 1, 2010

Walking God's Highway

Designed by Jeannie Phillips ~ Southside AL
Click on any picture to enlarge.

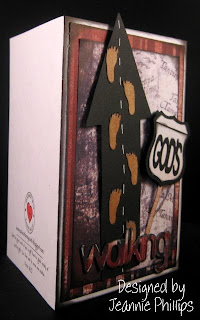
I found this paper ... its paper... so I had a bit of trouble... (remember to buy card-stock Jeannie...remember to buy card-stock!)...but it was so perfect for my son, John-Robert... it just screamed his name... let me tell you a bit about John-Robert... he started RA camp in the summer... a church camp... when he was 8... became a counselor a year before he was suppose to be eligible at 15...and now he is On-Site Director this is his 3rd year...and he is 22... he is so close to God... he has taught me so much about how to be close to God... if I have a God question I ask John-Robert... he has even preached...and I got to hear him...and it blew me away!!.... he loves sharing the fact that God loves us... and for Christmas he gave me a One Year Bible... I have not missed a day reading it...and it has changed my life... made me a much better Christian and a much better person... and I am so excited about the changes!!!... so this card is for John-Robert who walks God's Highway!!!

CRICUT & GYPSY
I am not including Cricut instructions on this card because of the welding...and the stretching of several of the objects.
New Arrival
Feet cut @ w 0.85 x h 1.0.. you will have to unlink the width and length for this....I stretched the length of the feet to make them look like adult feet.
Graphically Speaking
Arrow cut @ w 5.48 x h 2.53... you will also have to unlink the width and length for this cut... the bottom of the arrow is glued to the background the top is pop-dotted from the background.
Going Places
Highway Sign cut @ w 1.68 x h 1.64... I cut two in black and one in white...the white one I trimmed the center pieces out and adhered to one of the black pieced...the other black piece is popped from the background ...then the one with the white is popped for that.
George
letter I for the sign post cut @ w 0.39 x h 2.10
Learning Curve
"walking" cut @ h 1.0.. set the height and the width will be right... I welded these together....I cut two of these in black card-stock and one in paper and glued them all together to give a chipboard look.
"GOD'S" cut @ I put these on the mat at h 1.0... then I welded the letter together...and then I changed the group of letters to w 1.14 x h 0.96.


Thursday, February 4, 2010

Hope the Sun Peeks Out Soon

Designed by Jeannie Phillips - Southside, Al
Click on any picture to enlarge.
I have had this card in my head for some time.... just didn't know exactly how I wanted to do it... then today with the rain... and the prayer before my nap for a card ... I woke up with it in my head  just the way to work it out!!!... I am so excited about it...  wasn't sure I liked the Animal Kingdom mice...but they turned out really cute!!... hope everyone is having a blessed day... Thank you all for blessing me all the time!... Hugs Jeannie

CRICUT & GYPSY
Animal Kingdom
Mice (border cut) cut @ w 2.71 x h 1.63...I cut it twice and trimmed the heads off the second cut to pop from the bodies of the first cut.... on the Cricut I would cut this @ 1 1/2 inches.
Walk in My Garden
Flowers and the layer cut for the center cut @ w 3.08 x h 1.97... you will need to unlink the width and height to get these dimensions....cut twice and popped the second layer from the first and the first layer from the background...on the Cricut I would cut these at 2 inches.
Everyday Paper Dolls
Clouds cut @ w 4.14 x h 2.57... you will have to unlink the width and height to get these dimensions....I cut three one for the inside and two for the front...the top one is popped...on the Cricut I would cut these at 2 1/2 inches several times and glue together to get the width you want.
A Child's Year
Raindrops...(teardrops) cut @ w 0.43 x h 0.86 ....On the Cricut I would cut these @ 3/4 an inch.
Dreams Come True (Disney)
Rose (I only used the stem) cut @ 2 3.30 x h 3.59...on the Cricut I would cut this @ 3 1/2 inches.
Water Splashes (welded to the rectangle for the water at the bottom of the page) cut @ w 1.18 x
 h 0.76...on the Cricut I would cut these @ 3/4 and inch.
George
Rectangle cut @ w 0.55 x h 3 1/2 inches...I would cut this with a paper cutter if I were using the Cricut.


Monday, August 31, 2009

Believe in Yourself!

Designed by Jeannie Phillips - Southside, AL
Click on any picture to enlarge.

Oh I was so excited when I got my Cottage Cutz Bee in the mail today... I have had card makers block today... need need to make a couple of cards...and I am just thinking about them too much... then I opened my mailbox and had this bee!!!... well I went straight to work on a card I don't need... lol...how sad is that!!... I hope you like it... thank you so much for looking! ~~Hugs, Jeannie
CRICUT
George
Flowers cut 2 3 1/4 inches for the outside and 1 1/4 inches for the inside.
The outside flower I cut twice popped the bottom one from the background paper and the top one I popped from the bottom flower.
Circles for flowers cut at 1 3/4 inch and 3/4 inch.
All text computer generated!
Home Decor
Flourish cut @ 1 1/2 and 1 3/4 inch.
COTTAGE CUTZ
Bee
I absolutely love this bee!
Lots of ink and gel pen dots.

Friday, July 24, 2009

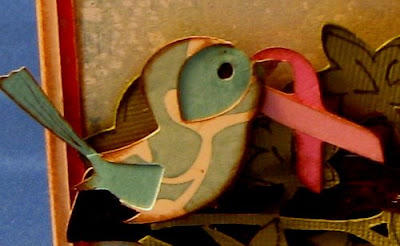
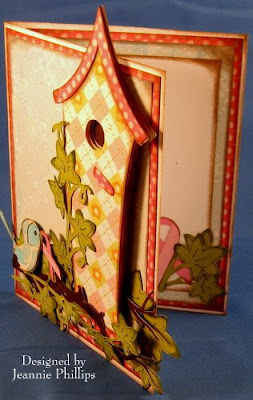
Little Bird of Hope

This card had to be special...and was such a labor of love!!... a friend of mine at work, Brittney her mom just found out she has Breast Cancer.... he mom is 54 I think...she need our prayers!!... Brittney wanted a special card for her mom and her mom loves birdhouses .... this is what I came up with...been working on it all morning I hope that she likes it... Please keep B's mom in your prayers!... thanks for looking... !
Hugs
Jeannie
CRICUT
Stretch Your Imagination
Birdhouse cut @ 5 1/2 inches on the stretch feature.
I cut it three times on regular cut once on layer to pop it from the page.
Pooh & Friends
Branch cut @ 7 inches and 6 inches on the layer feature.
Paper Doll Dress Up
Vine cut @ 1 3/4 inches 2 times and one time 2 1/4 inches.
It is on the paper doll wedding page.
Happily Ever After
Bird cut @ 1 1/2 inches using both cuts.
Stand and Salute
Pink ribbons cut @ 1 inch and 1 1/2 inch...on regular and layer cut.

Friday, April 24, 2009

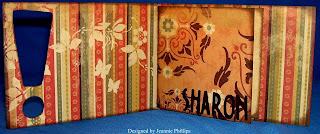
You Did It Sharon!

Designed by Jeannie Phillips
Southside, Al
This wonderful lady that I work with, Sharon... passed an important test that has been hanging over her for a while..... we are all so proud of her.... and she is so proud... so I made this card for her for all of us at work to sign.... the bottom picture is the place we can all sign at!!.... I hope that it makes her happy!.... she is the kind of person that makes us all happy every day!..
~~Hugs Jeannie
CRICUT
Wild Card
Card cut @ 4 inches... or fit to paper.
Square (so to speak) cut at 3 1/2 inches real dial size.
"You Did It" cut @ 4 inches.
Opposites Attract
"SHARON" cut @ 1 inch on opposite.
Lots of inking with brown ink.


Sunday, February 1, 2009

Bright Spot

This card is for my daughter, Madison ... she is studying for test and her CPA exam right now along with a full load for her Masters.... she is studying 8 or more hours a day and going to class and isn't going to get to come home for 3 weeks probably.... her sweet daddy went to get her stuff for a care package and I stayed home to make her this card... she loves loves the "Hungry" guy on the commercial... so that why I thought of "Bright Spot"... inside I am going to write we wanted you to have a Bright Spot in your studies! ... I hope it brightens her day!!

CRICUT
Graphically Speaking
Star-burst cut @ 1 1/4 inches.
I placed a punched circle of 1 1/2 inches in the middle.
My Community
Hands cut @ 1 inch... once on flipped.
Shoes cut @ 3/4 inch once on flipped.
PEACHY KEEN STAMP
Paper Doll Dress Up Stamp Set


Wednesday, January 7, 2009

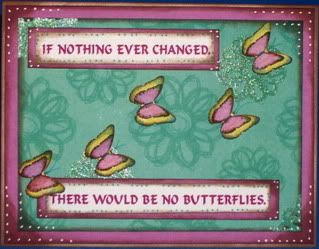
If Nothing Ever Changed II

This weeks win-a-free card!
I chose to make this card again with different paper for my win-a-free card, card this week because I loved the saying so much. This is also going to be one of my first card class cards that I will hopefully be teaching at Hobby Lobby starting in February ... Please keep your fingers crossed for me! ~~Jeannie
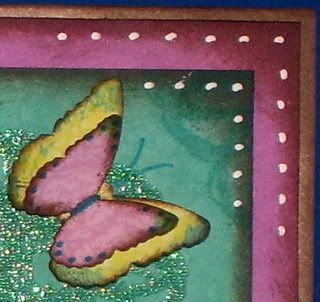
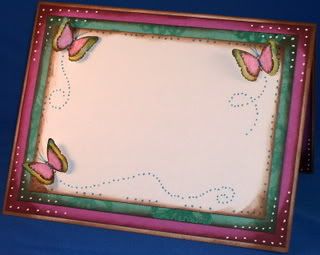
Martha Stewart Butterfly punches.
Lots of brown ink for aging.
Doodles with a Sharpie and a Unibal white gel pen.
I know, I know no Cricut can you believe that!!... I so love my Cricut and find it next to impossible to make a card without mine!


Blog Widget by LinkWithin
Thank you so much for signing my Guestbook... I have no idea how to reply to people who do sign in... but I so love it when you do!!... So thank you so much!... if you ever have any questions you can email me @ winacard@gmail.com. I will be happy to answer any questions you might have.

Thank you again for signing my Guestbook~
Jeannie

Please Sign In